
Diamond Loops Digital E2E Design on a Scrappy Squares Quilt
Now that my day job is supporting the Longarm League membership and teaching new longarm quilters how to start a business, I need to be extremely intentional about setting time aside to feed my own creativity or it does not happen.
After a 4-year hiatus, my passion for piecing was reignited this year after being invited to a retreat at Stitch Supply Co. in Altoona, Wisconsin. It was glorious! The desire to plan, cut, and sew a quilt top has stuck with me since retreat. I'm drawing the distinction here between piecing and quilting because I frequently quilt samples of new digital edge-to-edge designs, but that isn't the same feeling as creating patchwork.
It's safe to say, patchwork and I are back "on" again.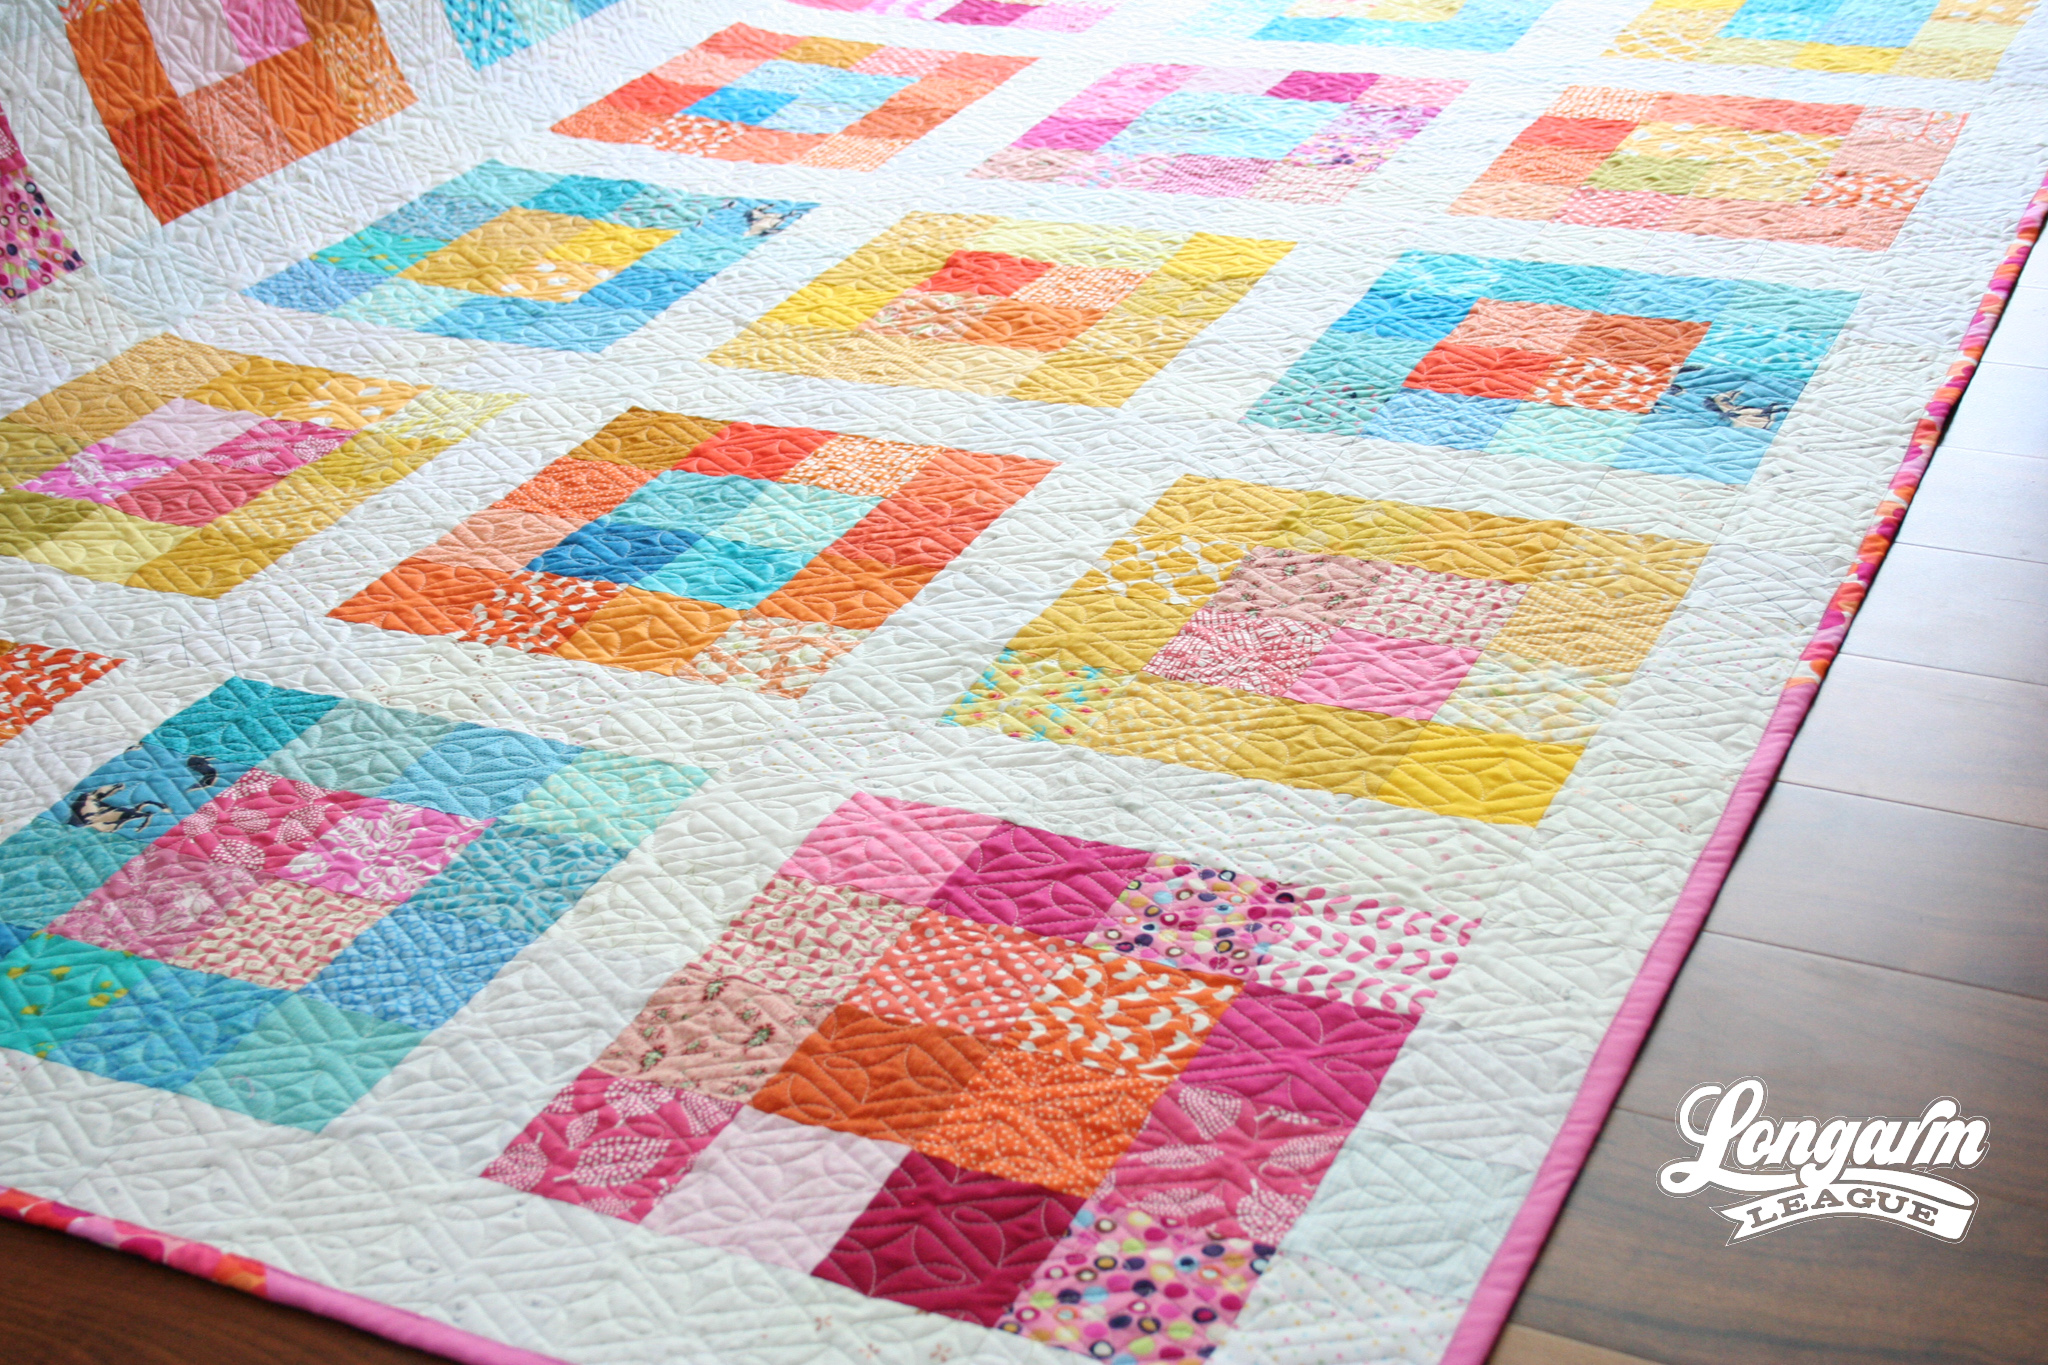
The Patchwork
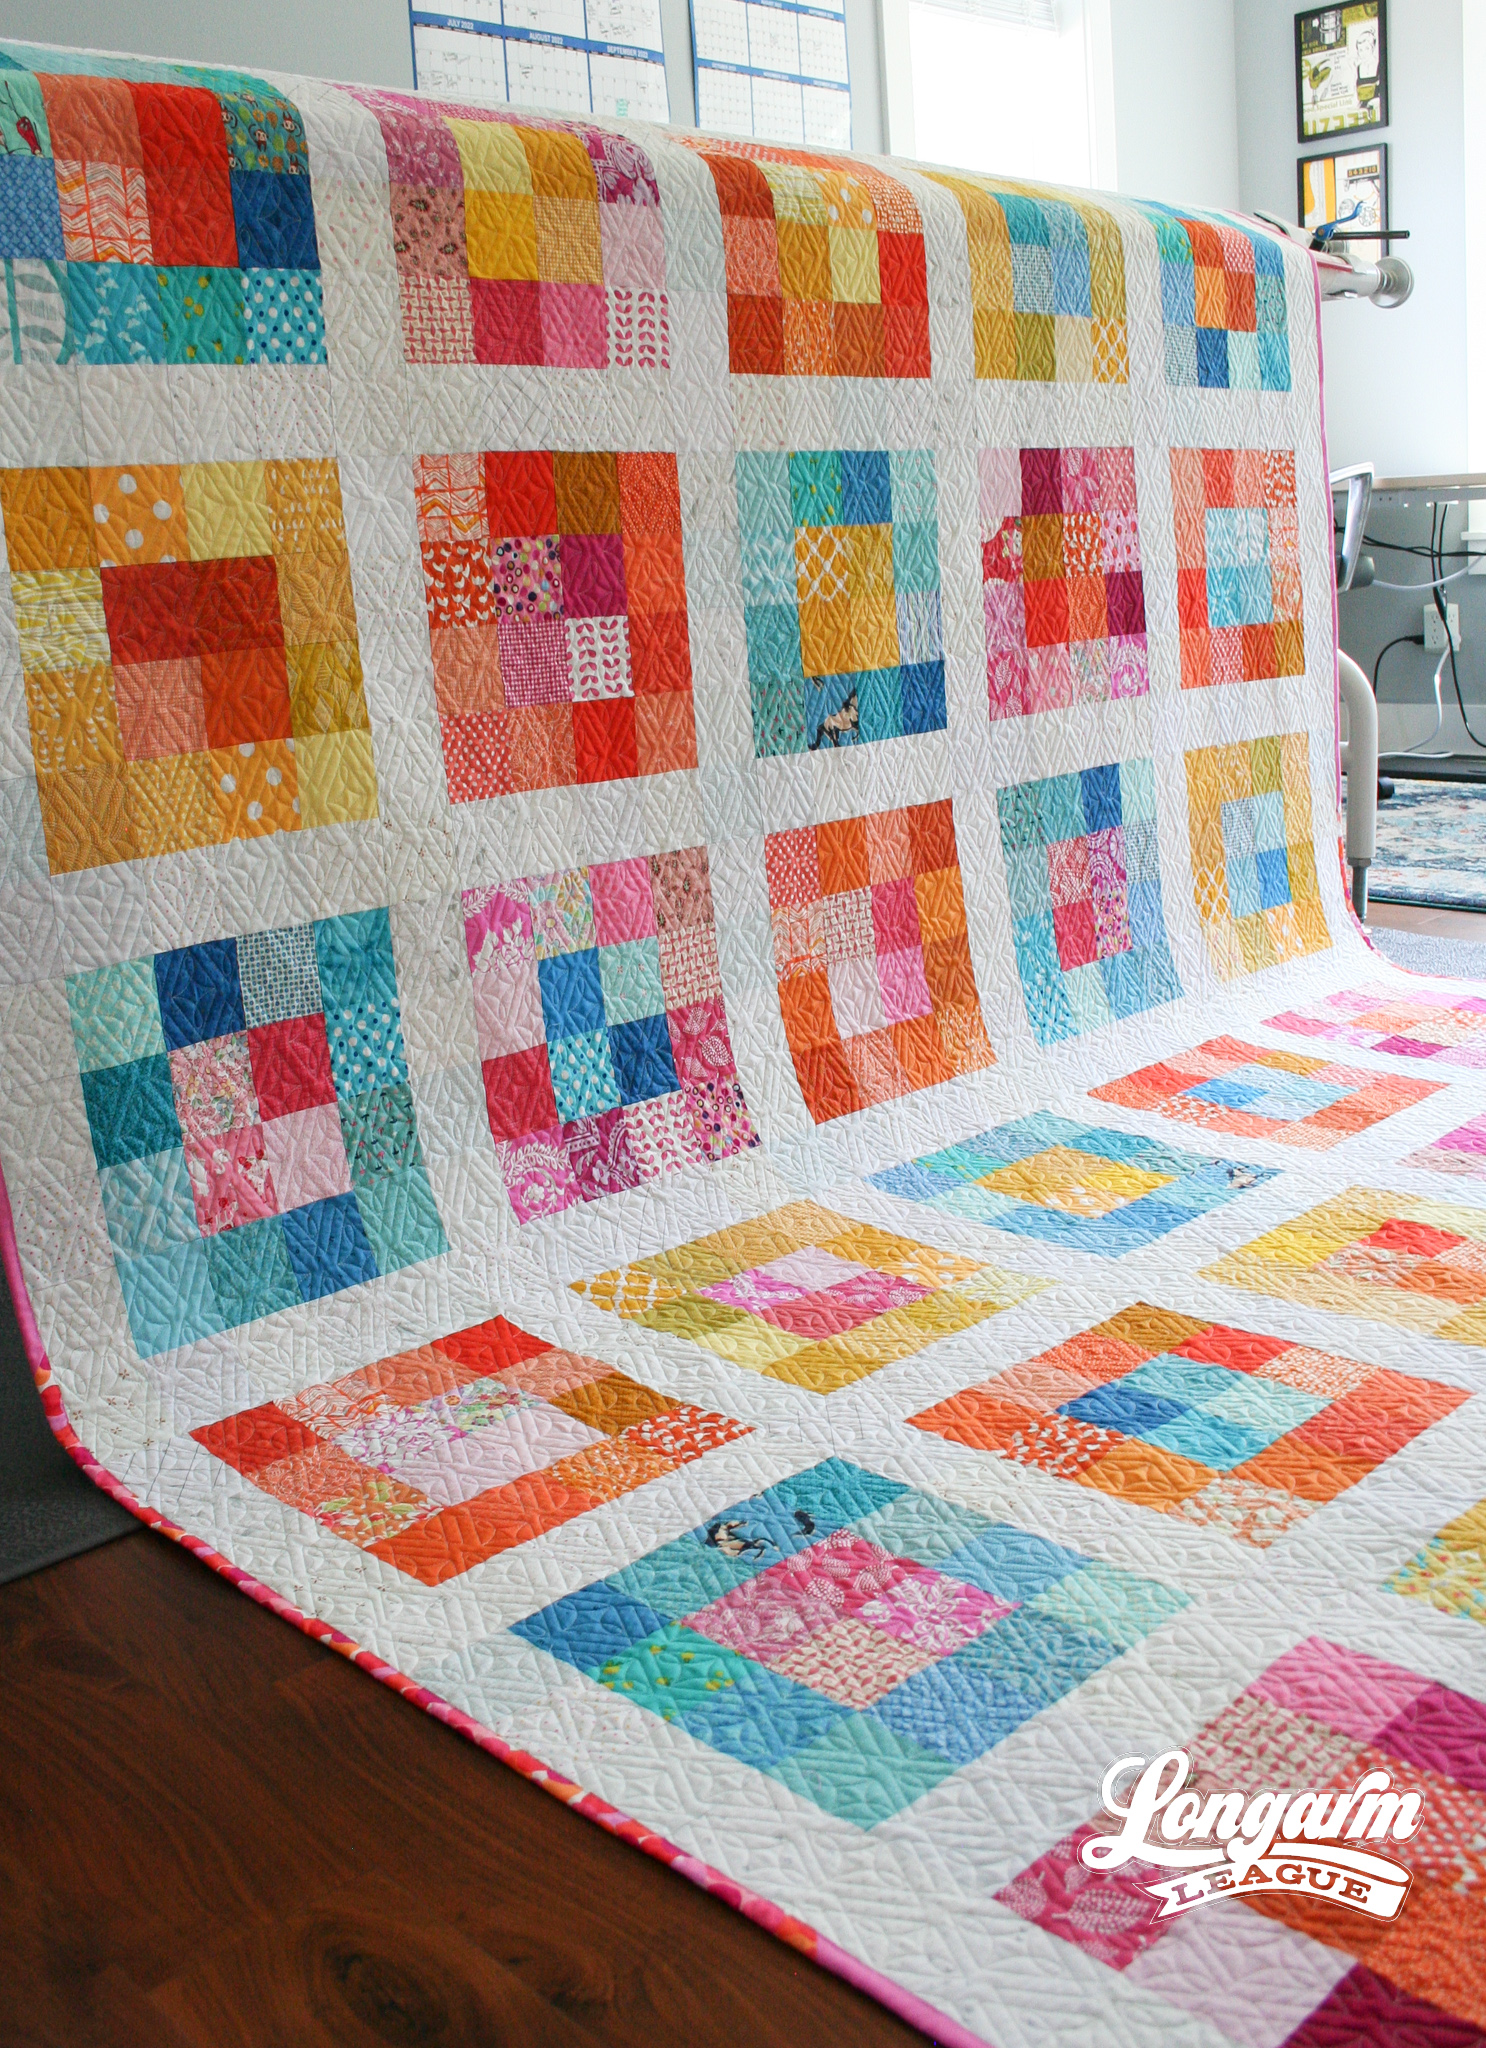
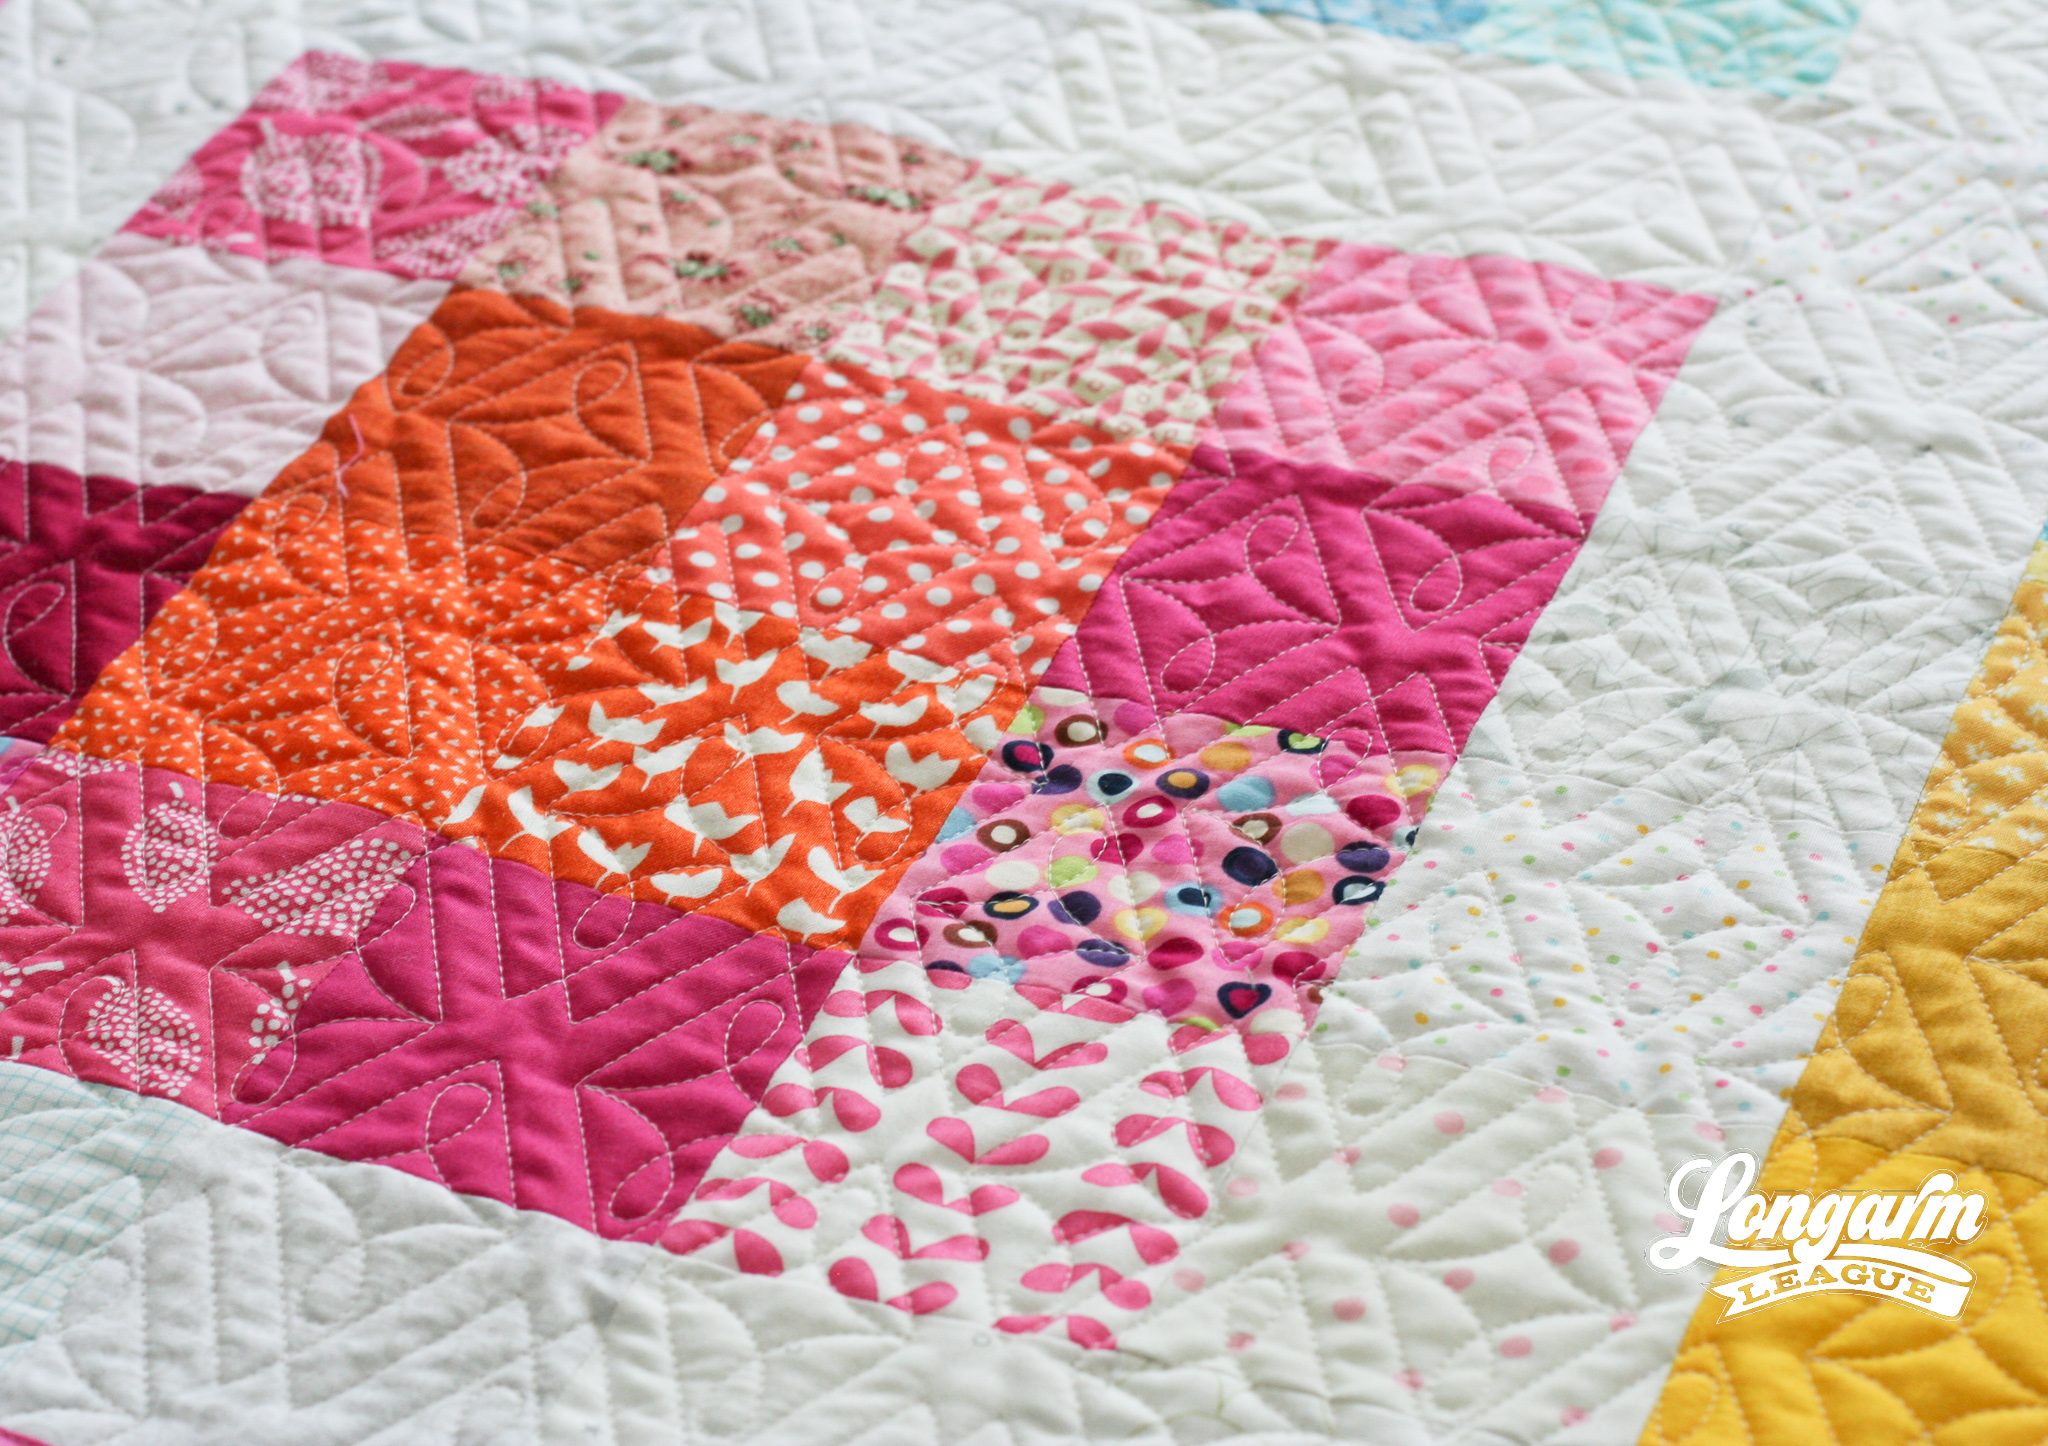
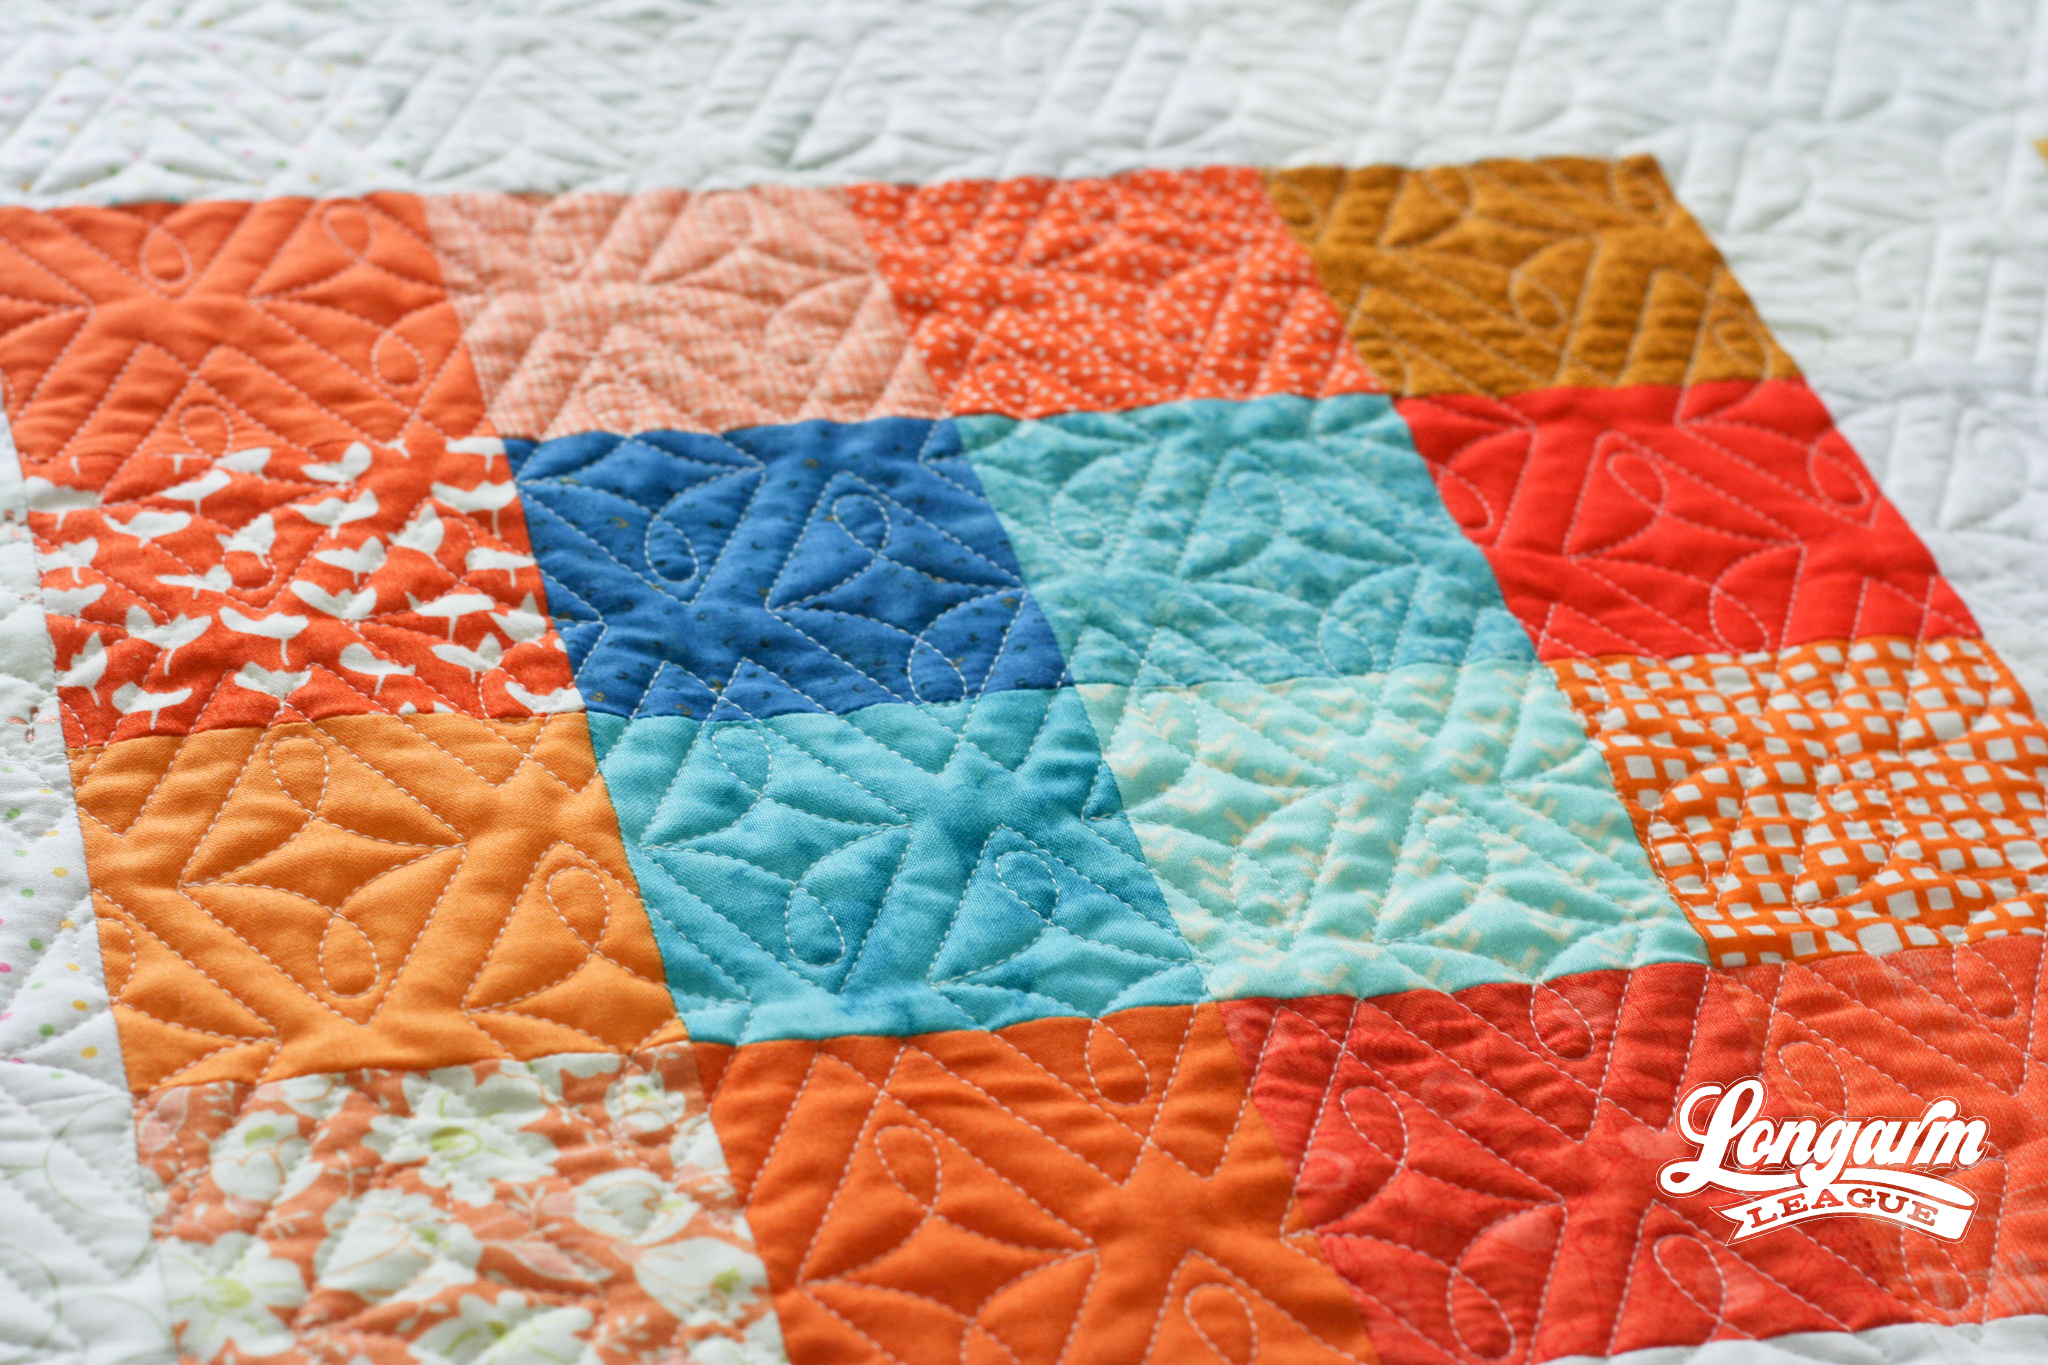
For this project, I started with a palette in mind. I pulled scraps from bins of pink, orange, yellow, and blue. I decided to work with the teal-y blues although I did let some darker royal shades pass through my filter.
I originally planned to make a lot of half-square triangle units, but when I make HSTs I prefer to use bigger squares to make multiple units at a time, like with the Magic 8 method. I realized I'd be able to incorporate a lot more fabrics (and do less work 😂) if I stuck to squares. So, I started by cutting piles and piles of 3.5" squares. I worked through each scrap bin, pressing my fabrics and cutting the pieces into as many 3.5" squares as I could manage.
Once I had a decent stack of squares in each color, I had to decide how I was going to sew them back together. I wanted a 4-patch unit in one color family to be at the center of each block, with a "frame" of another color family surrounding each 4-patch. On my cutting mat, I laid out all sixteen squares in a grid. I chain pieced the squares and kept them all webbed together as I completed each block. That made it go a bit faster.
To get an even(~ish) distribution of color, I started with one fabric group in the center—let's take orange, for example—and then made blocks with a pink frame surrounding each 4-patch, and then one with a yellow frame, and then blue. Then I made a new batch of blocks with blue 4-patches in the center, sewing up blocks with frames of pink, yellow, and orange around each center. I'd move on to the next color, making three blocks at a time, and so on.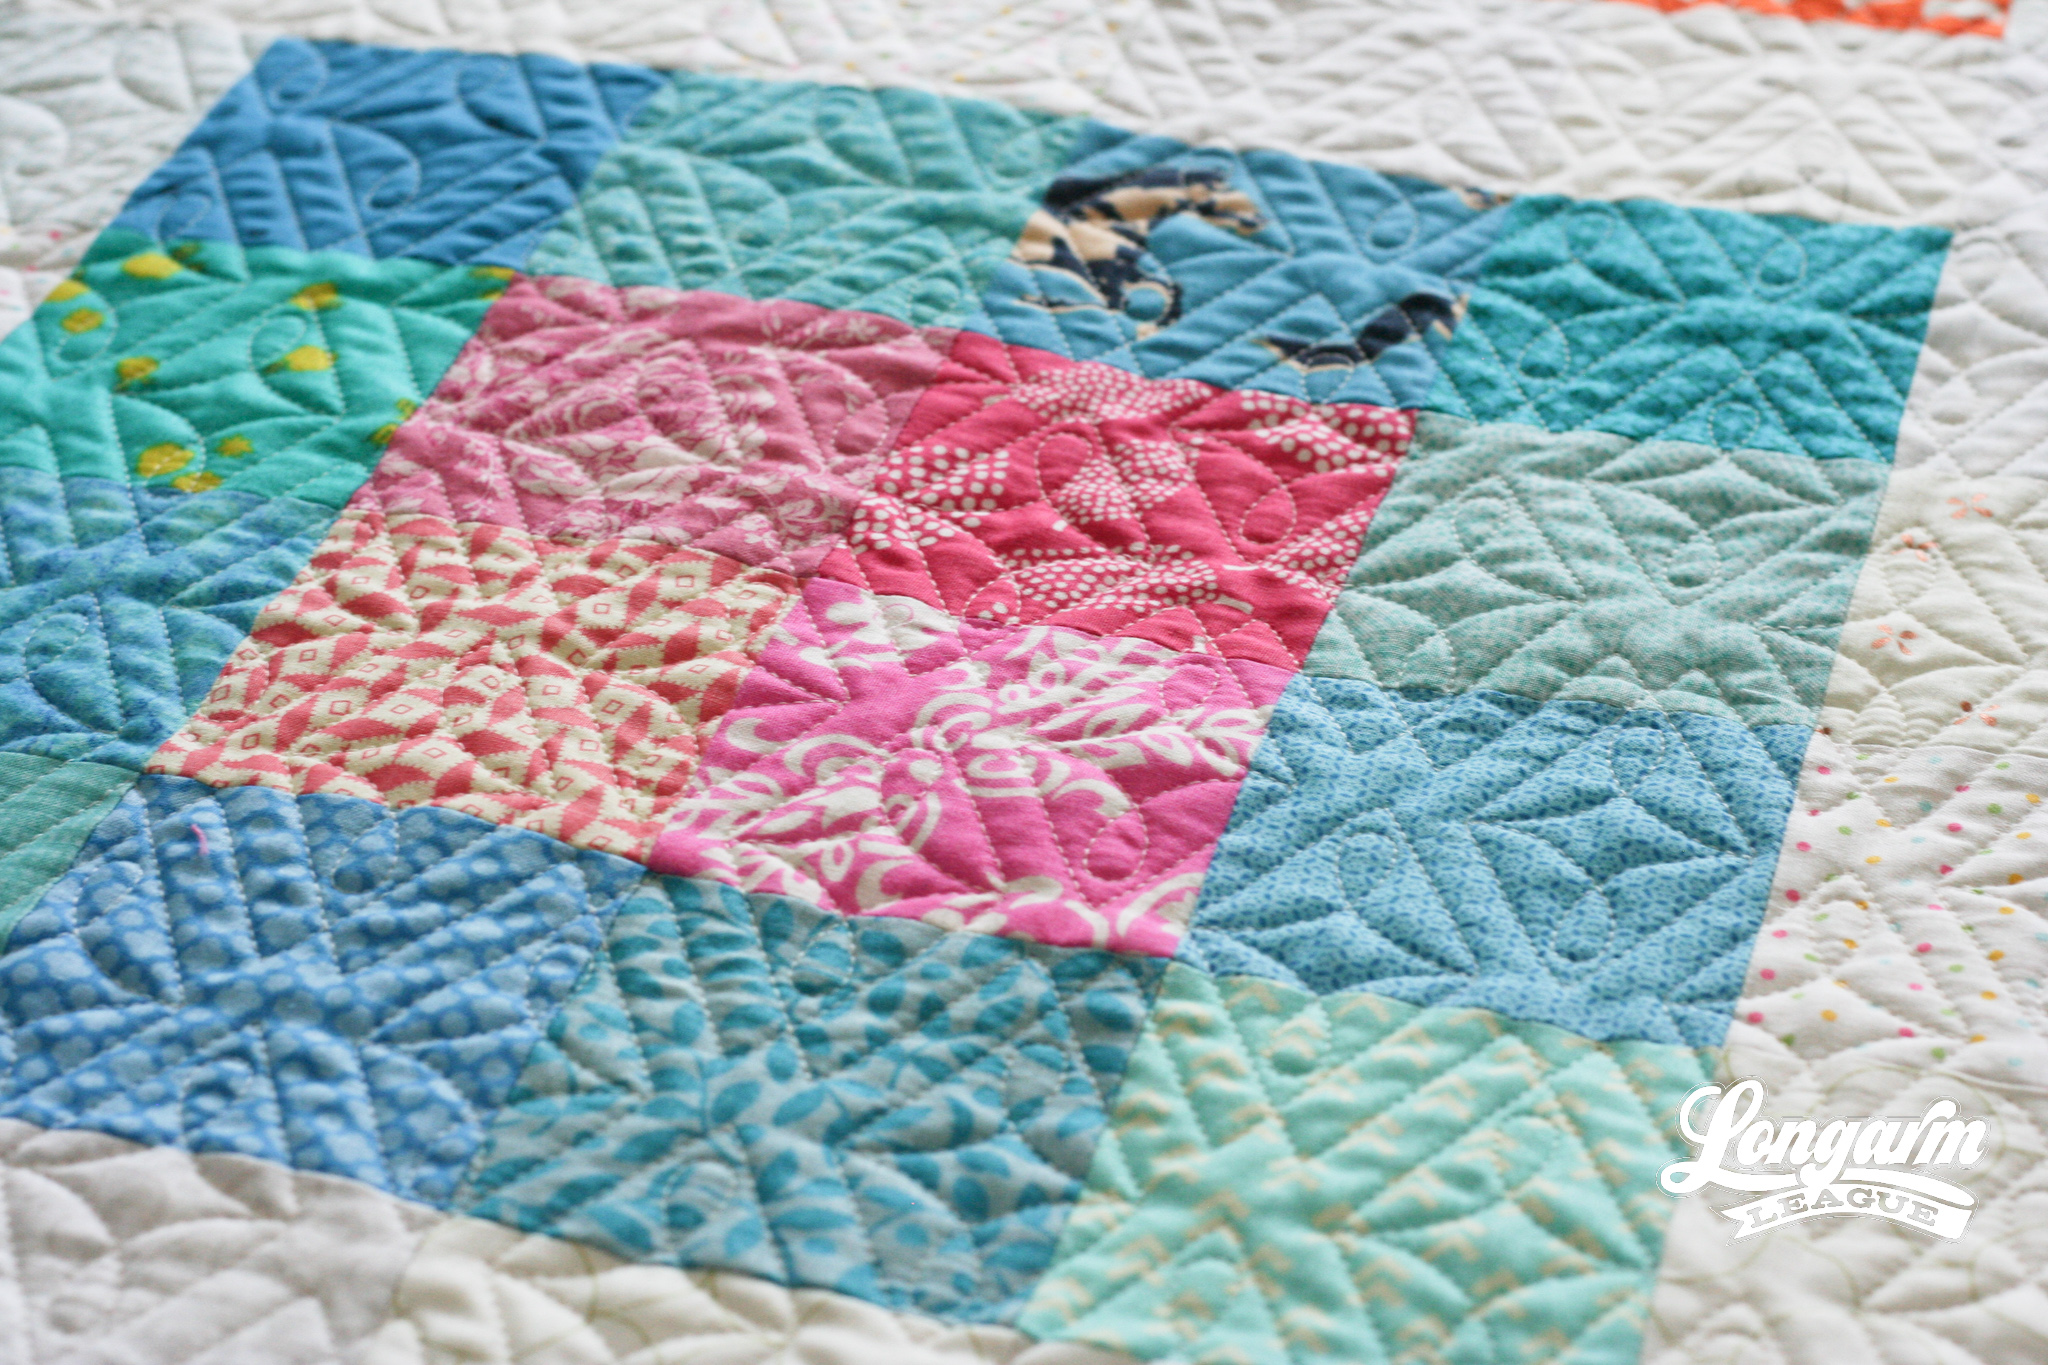
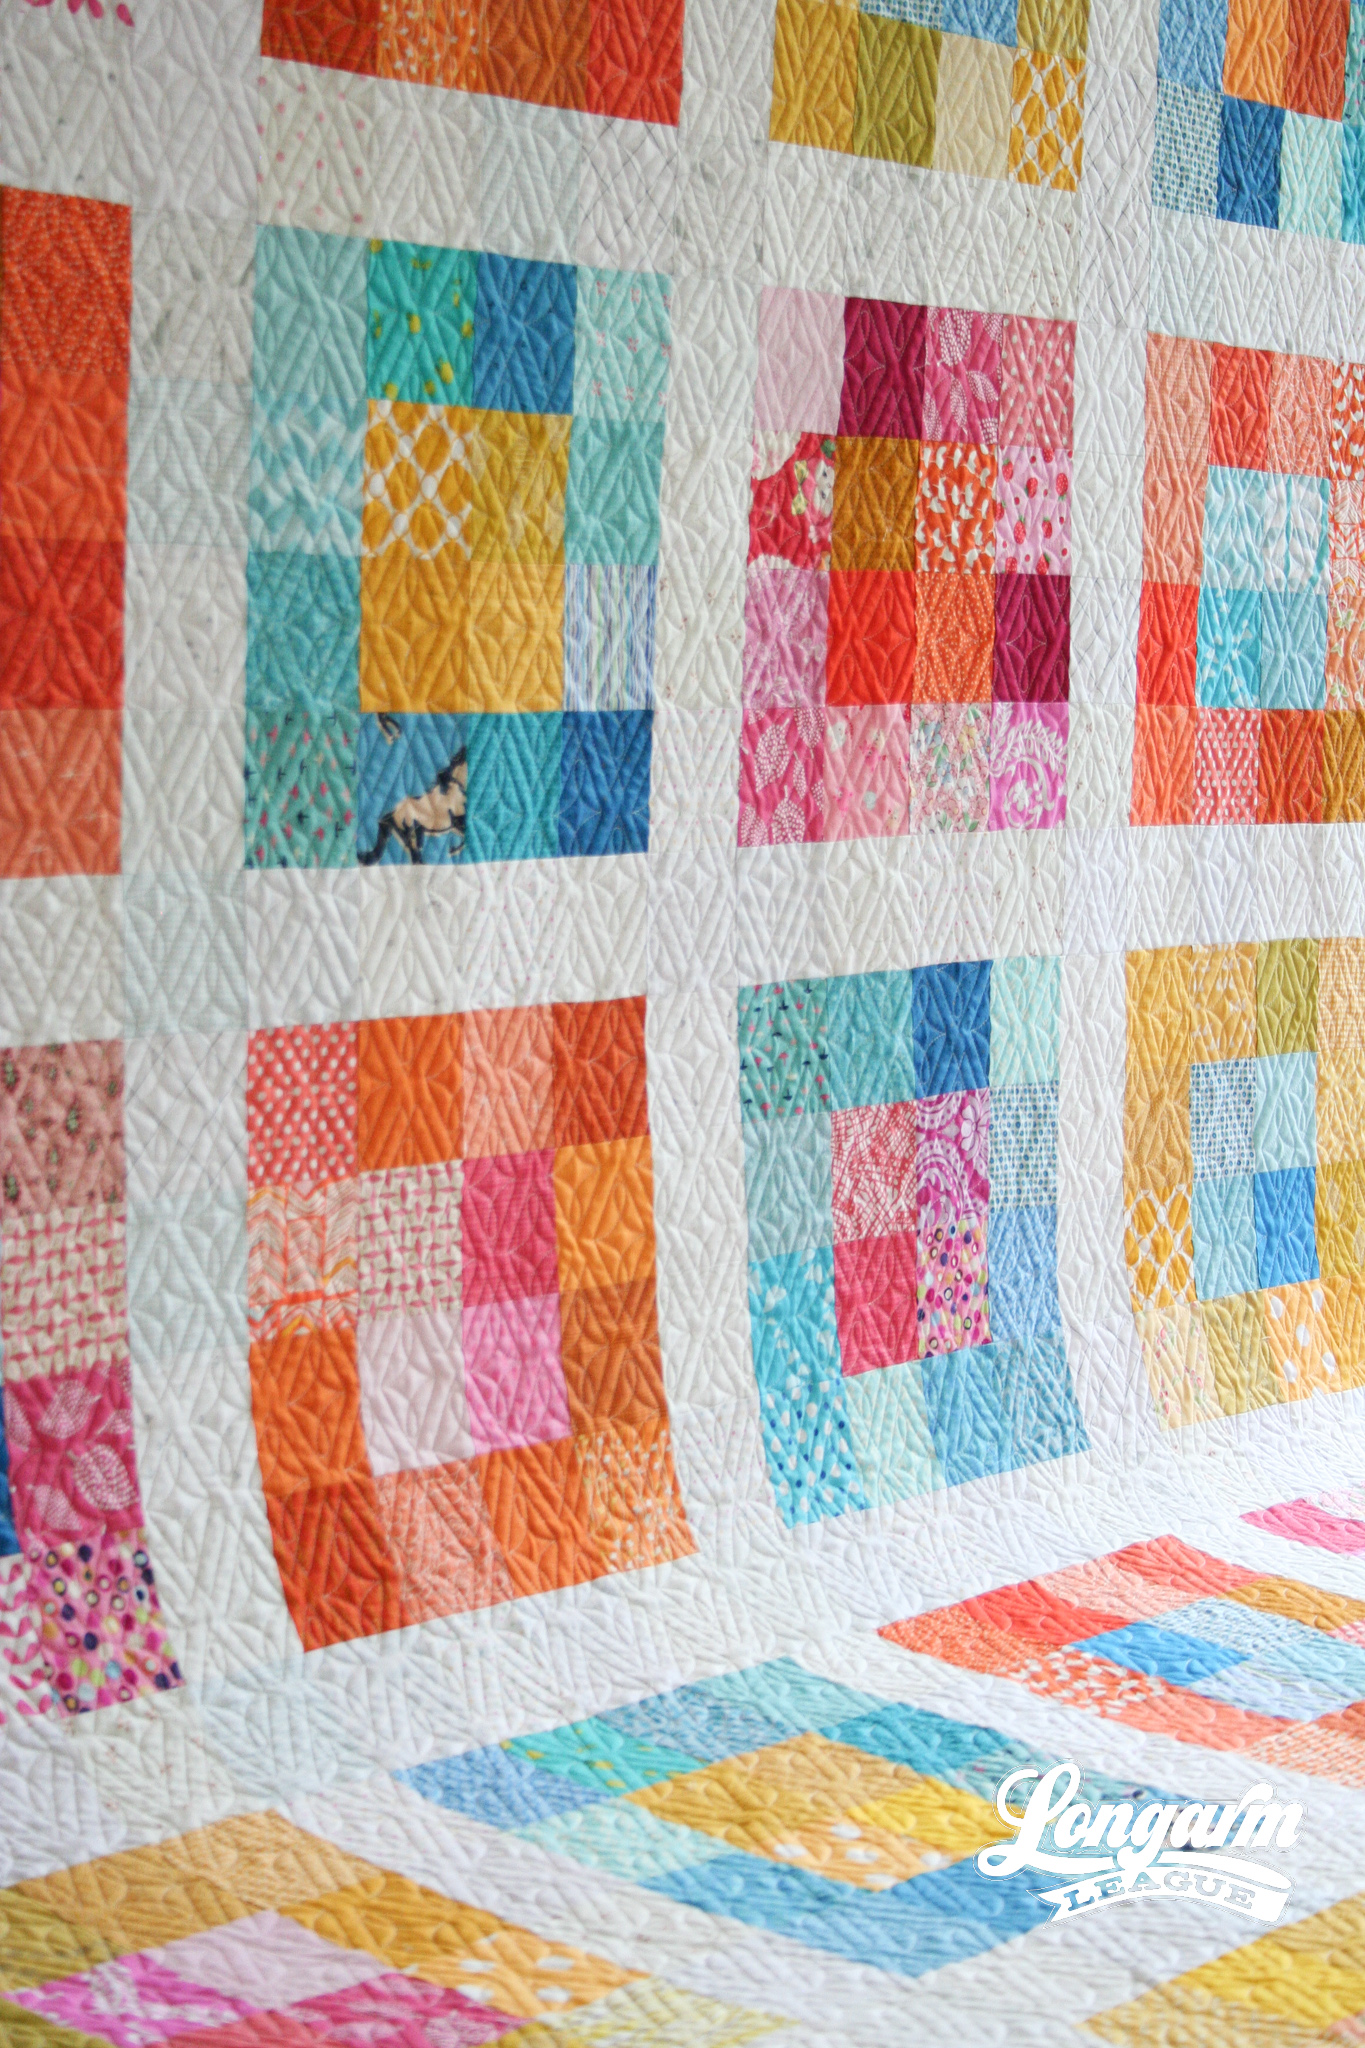
I kept sewing and sewing until I had a total of 30 blocks and laid them out on my quilting room floor. All blocks were 12.5" square at this stage, but would finish at 12".
At first, I was really trying to get away with not adding any kind of sashing, but in my gut I knew that I would be much happier if the blocks were set off by some kind of neutral sashing.
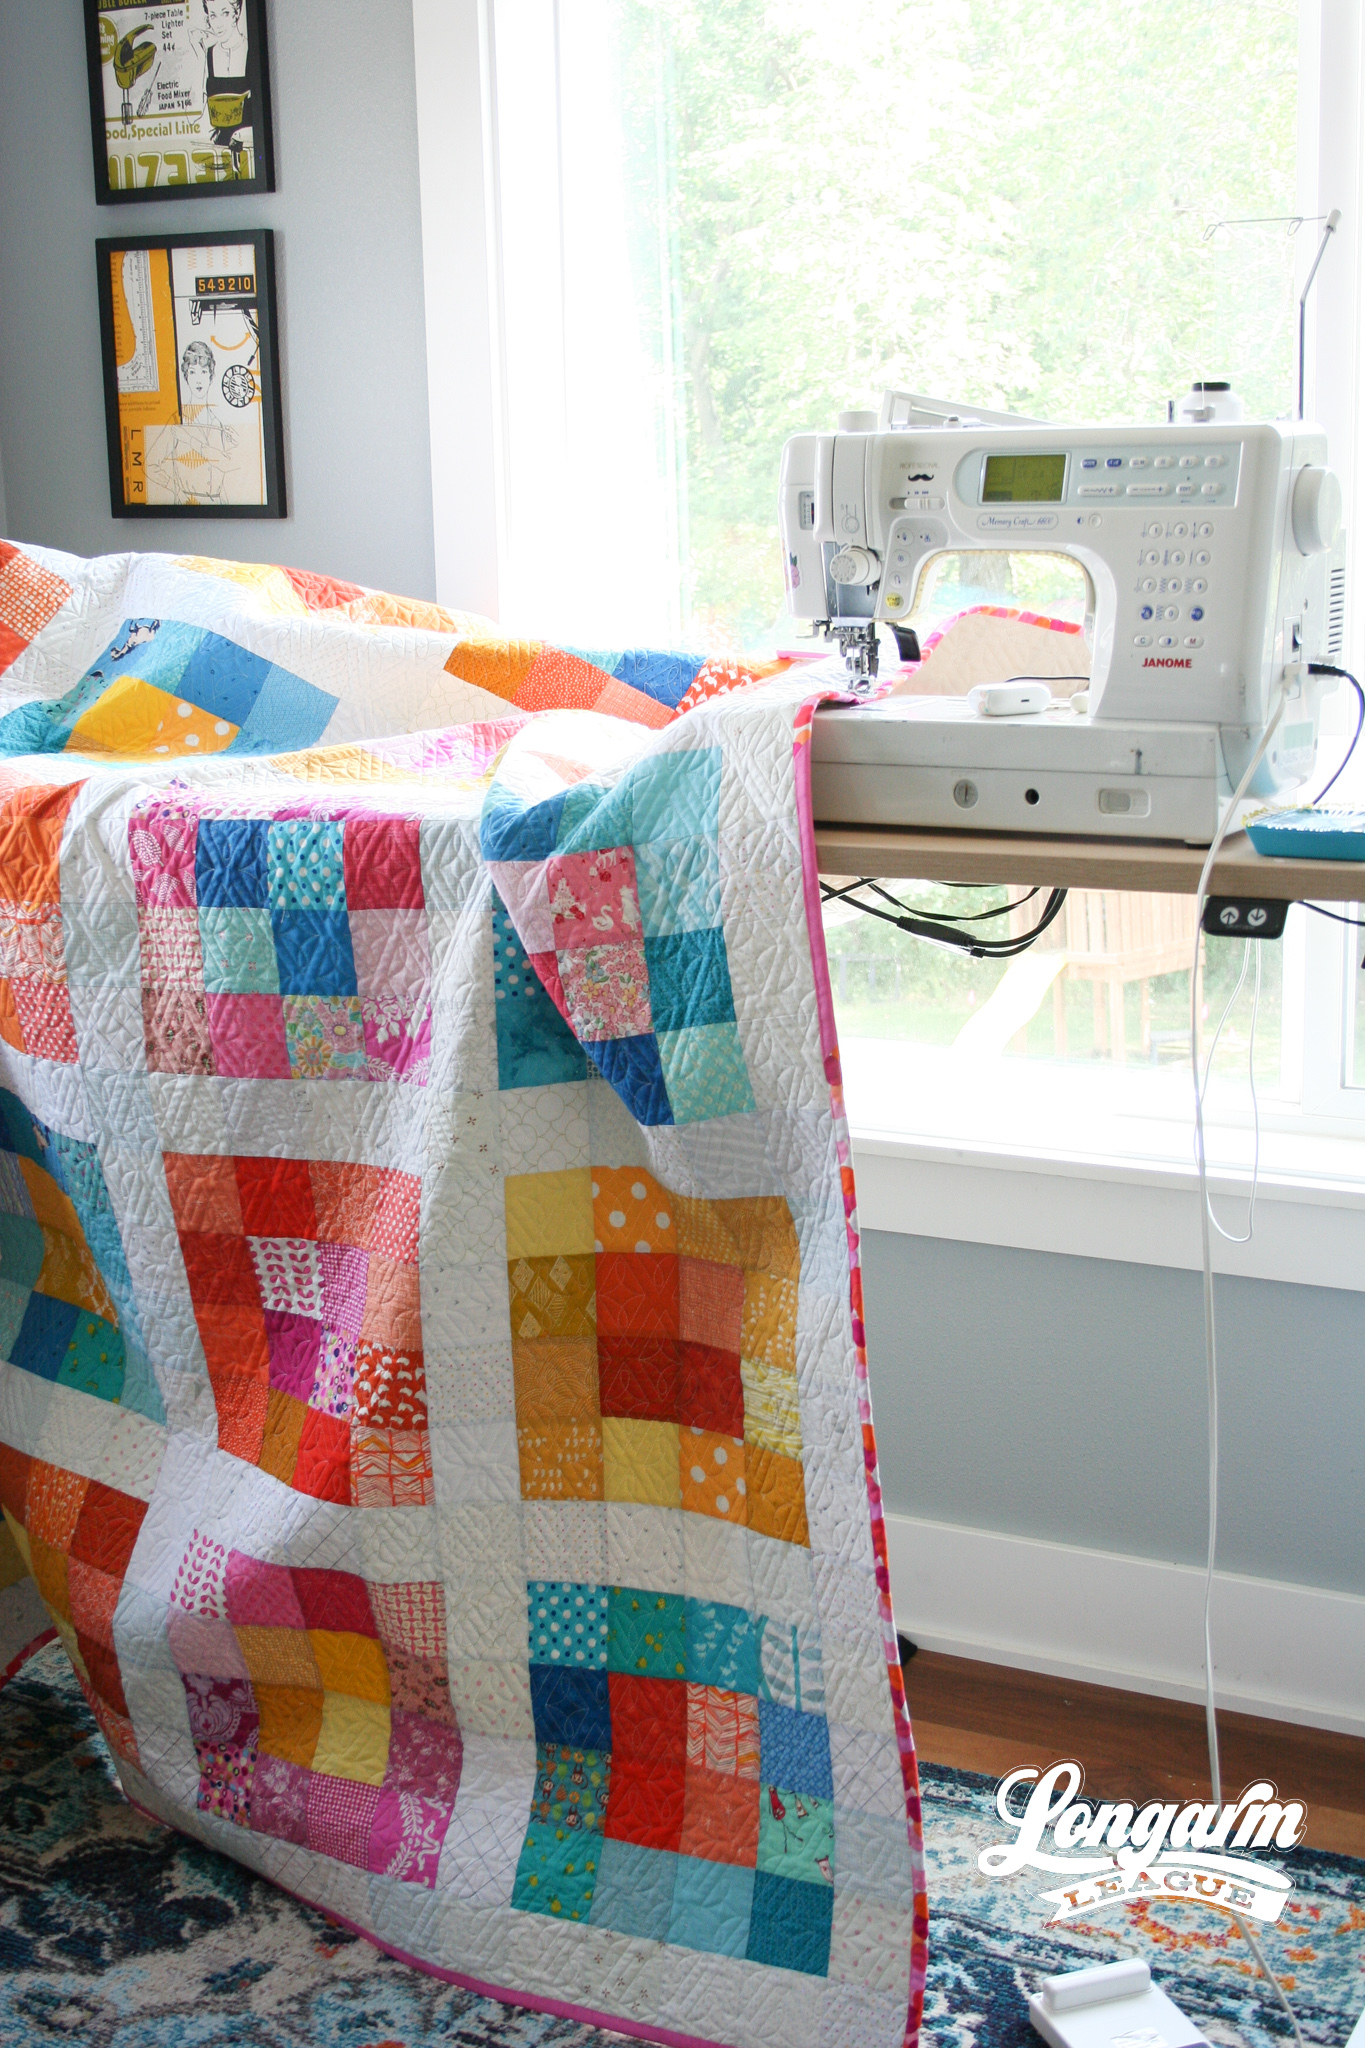
I went to my low-volume fabrics and began cutting out more 3.5" squares. I quickly realized that it was going to be almost the same amount of work to sew the sashing strips and borders as it was to sew all of the original blocks! It's okay, though, because I absolutely love how the low-volume white prints allow the colors to shine in the final layout.
I began sewing couplets of low-volume squares together and then joining them to create small 1 x 4 sashing strips. I placed them as vertical sashings between blocks, adding one segment at the beginning and end of each row. When I had an entire row sewn—including the sashing strips—I started piecing the horizontal sashing/border strips which consisted of 26 low-volume squares in a long row. I attached the long sashing strips to the top of each row. When that was done, I sewed one last long sashing to the bottom edge of the last row of blocks. Lastly, I sewed the rows together two-at-a-time and then sewed the segments together to complete the top.
If you're interested, here are the number of 3.5" squares I used for making this top (78" x 96"):
Assorted blues: 140 (8 centers and 9 frames)
Assorted pinks: 104 (8 centers and 6 frames)
Assorted oranges: 128 (8 centers and 8 frames)
Assorted yellows: 108 (6 centers and 7 frames)
Assorted low-volume prints: 326 (sashing and border)

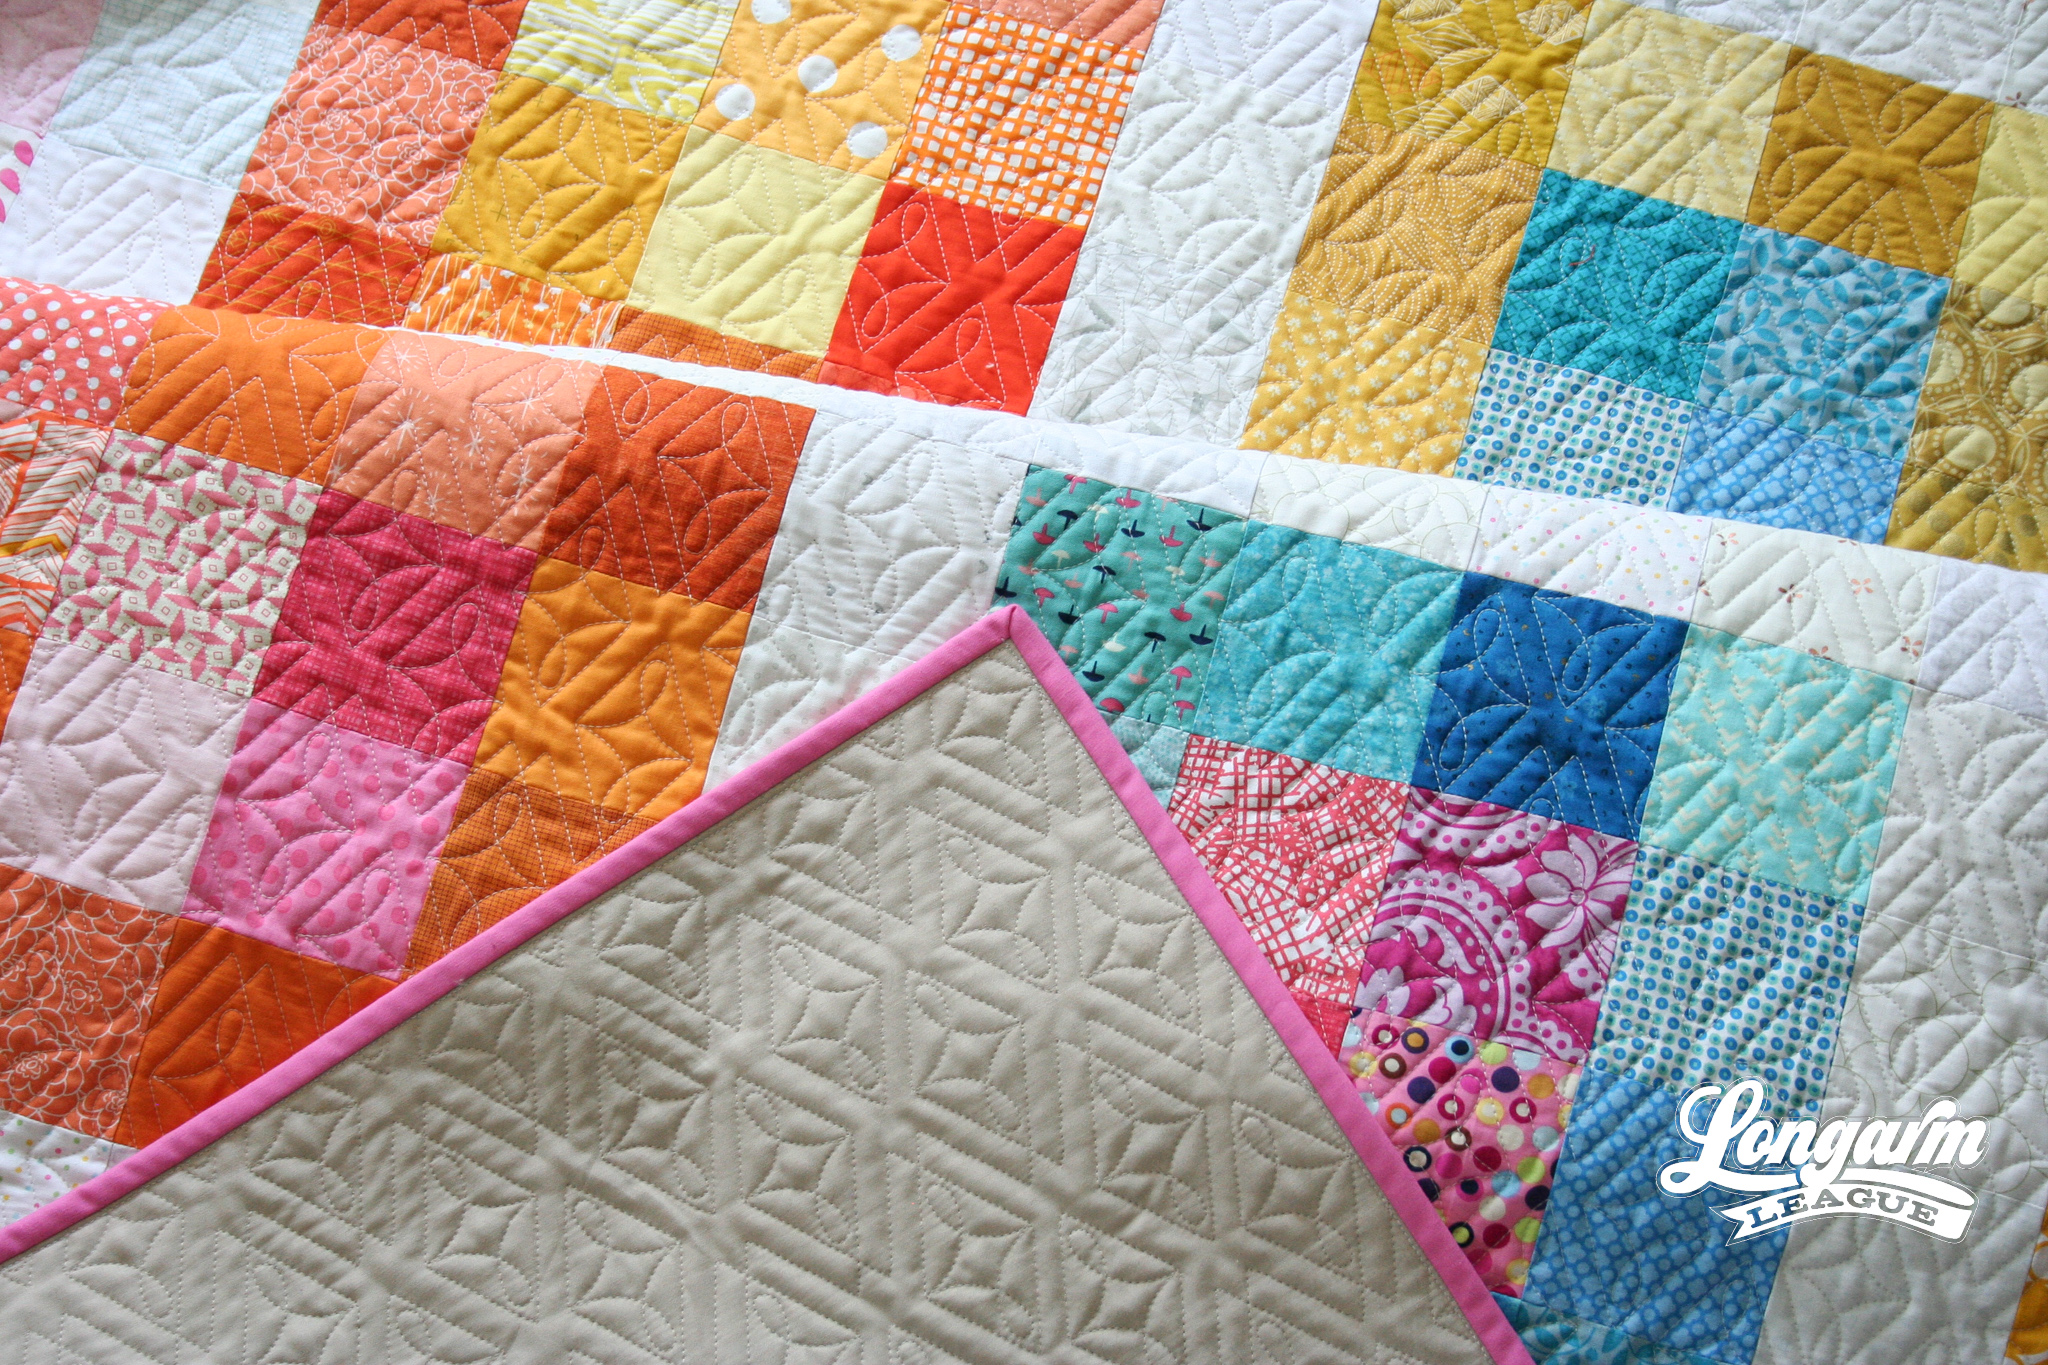
For the sake of convenience, I used a wide fabric (Kona Parchment wide 108" bolt) that I already had for the backing. I wasn't in the mood to do more piecing by this point! I also had a queen sized packaged 100% cotton batting from Quilters Dream leftover from my client-quilting days that I was eager to use up. It wasn't without drama, but that's a story for another day.

The Quilting
Now to my favorite part, the quilting phase!
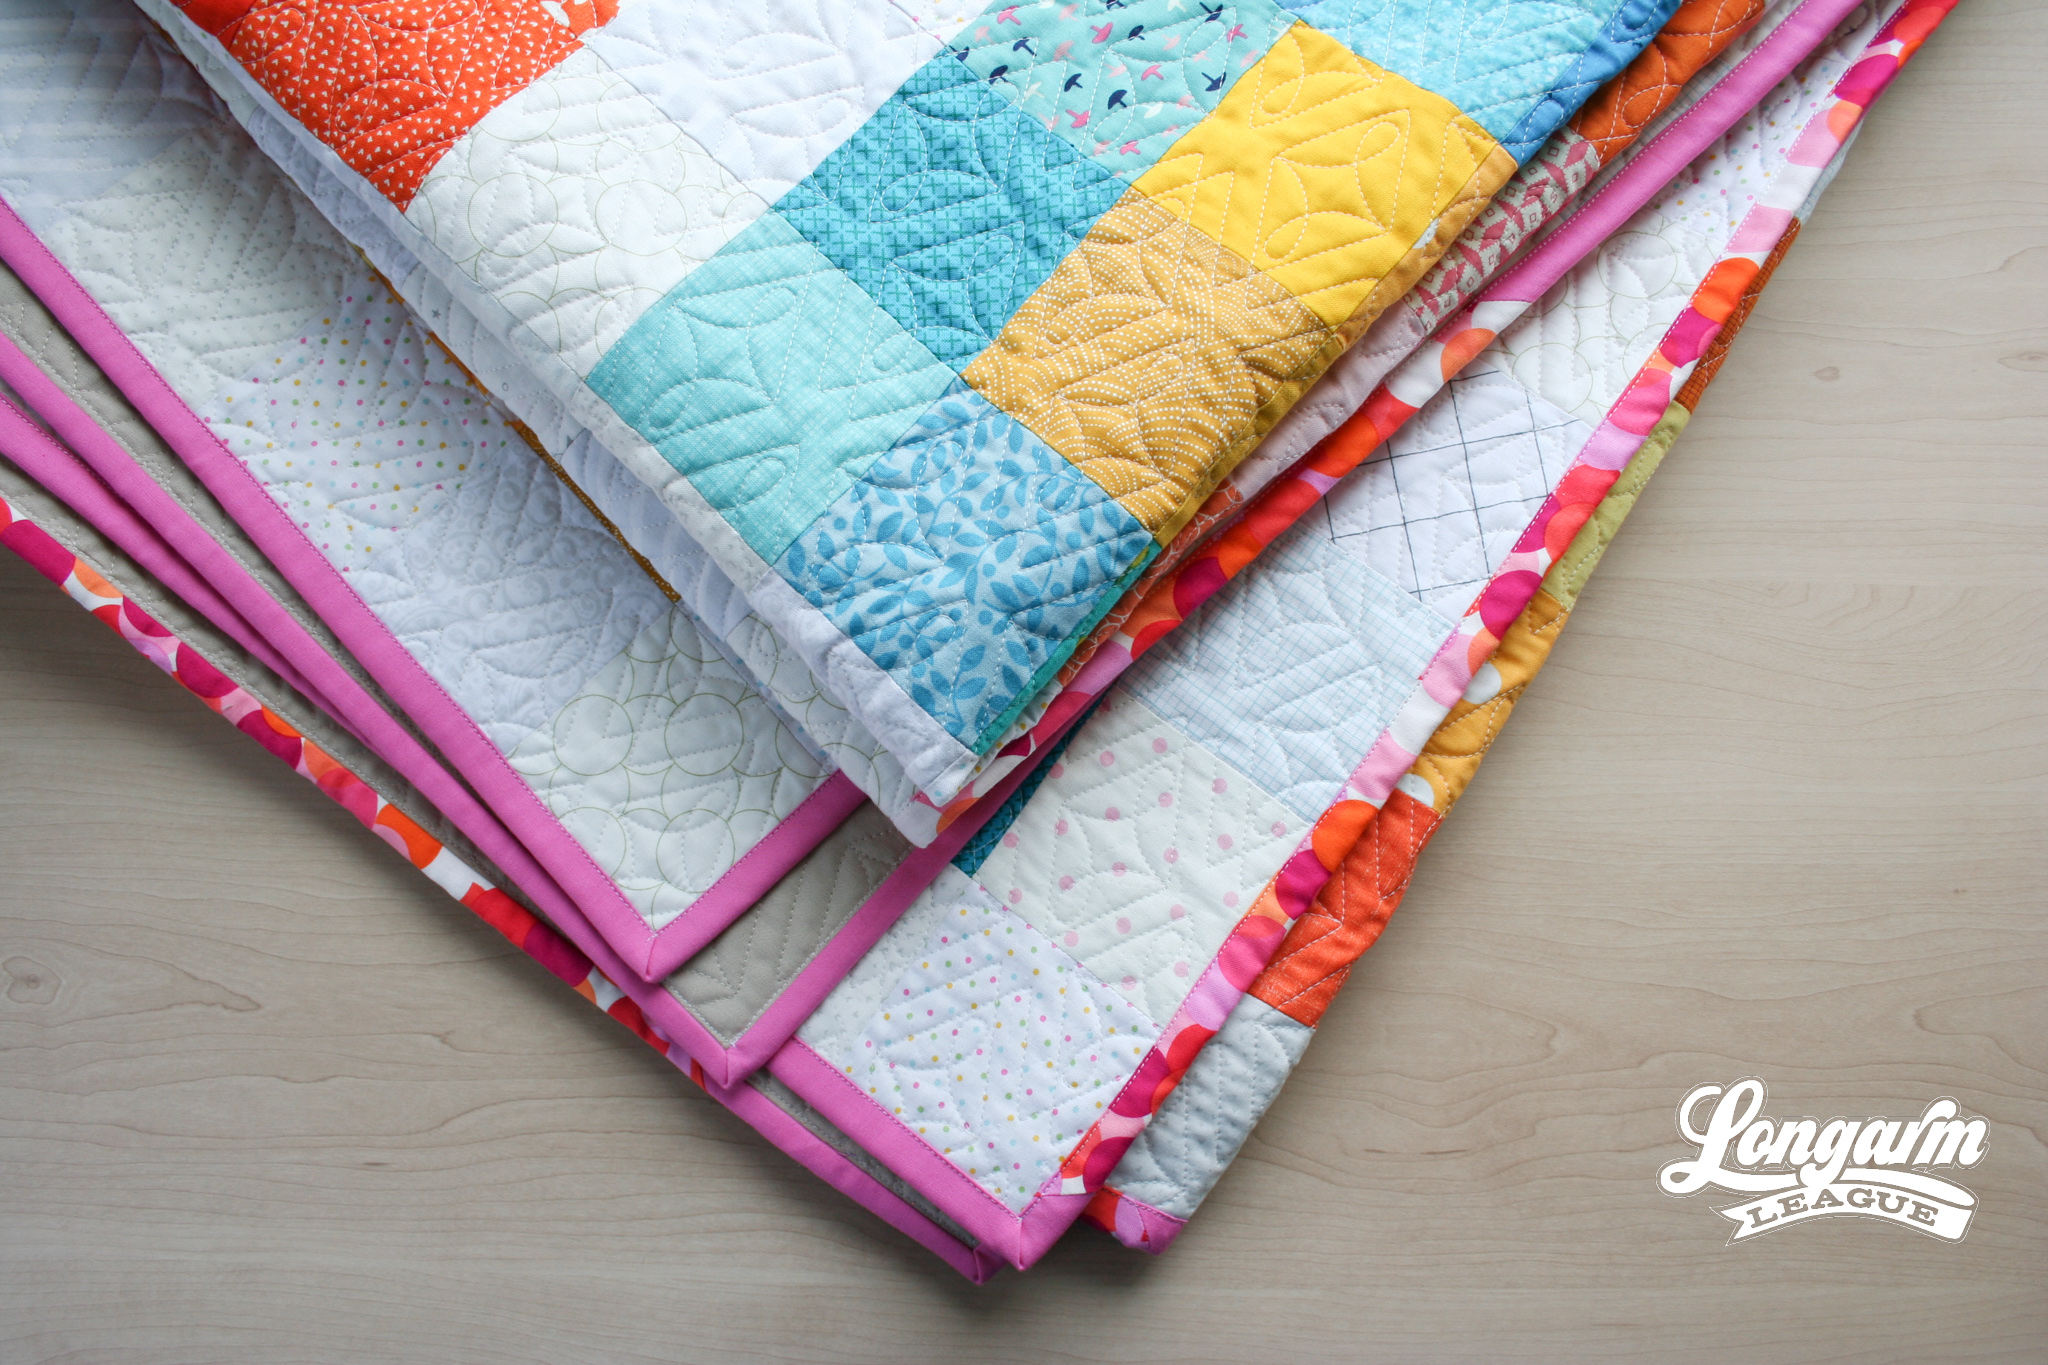
As I was piecing the top together, I knew that I wanted to use our design called Diamond Loops for the edge-to-edge quilting design. When I was quilting for clients, I'd used the design a handful of times but never had the design on anything of my own.
By the way, you can check out how other quilters have used this design by searching the #diamondloopspanto hashtag on Instagram. As silly as this sounds, seeing others use it was a big inspiration to me. 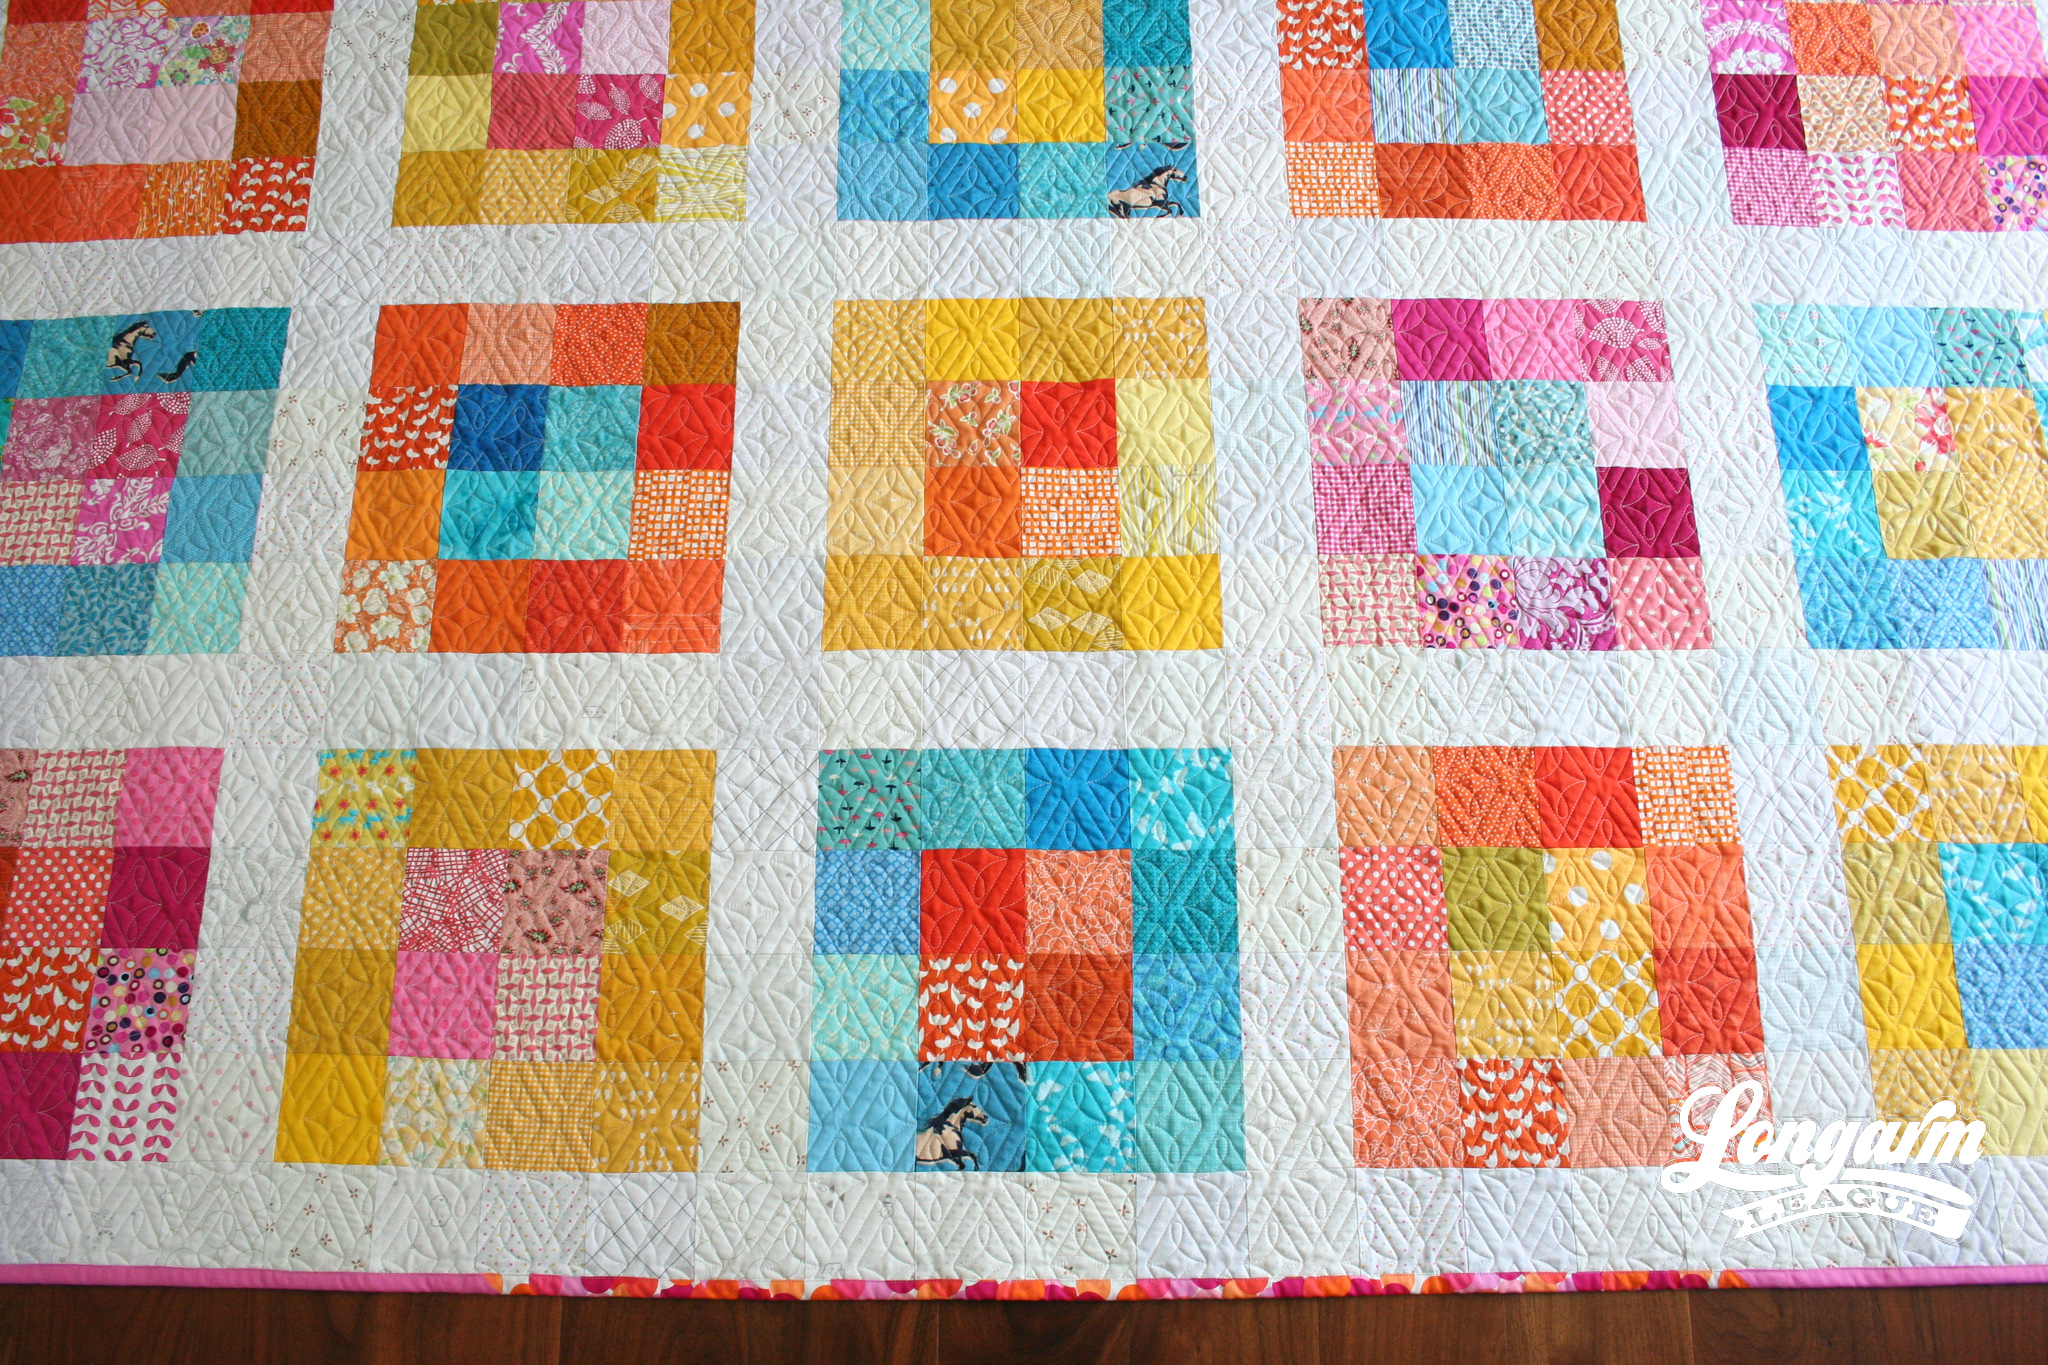
You would think I would also know how to size this design seeing as how I created it. Not the case! I set up in my Intelliquilter and started stitching. It was way TOO BIG for my liking. So, if you find yourself not getting the sizing "right" on your first try, know that you are not alone! Luckily, I didn't get too far before I stopped and grabbed my seam ripper.
I remembered that I'd entered the sizing details of my past projects in our Longarm League Pantograph Database. This is a LL member benefit. Basically, it's a user-uploaded database of stitched-out designs of any computerized designs whatsoever from all over the internet. Each entry includes sizing details, links to purchase, user notes and most importantly—photos. I visited my own database entry and saw exactly how I sized it in the past so I could replicate the look. I'll share those details with you next. 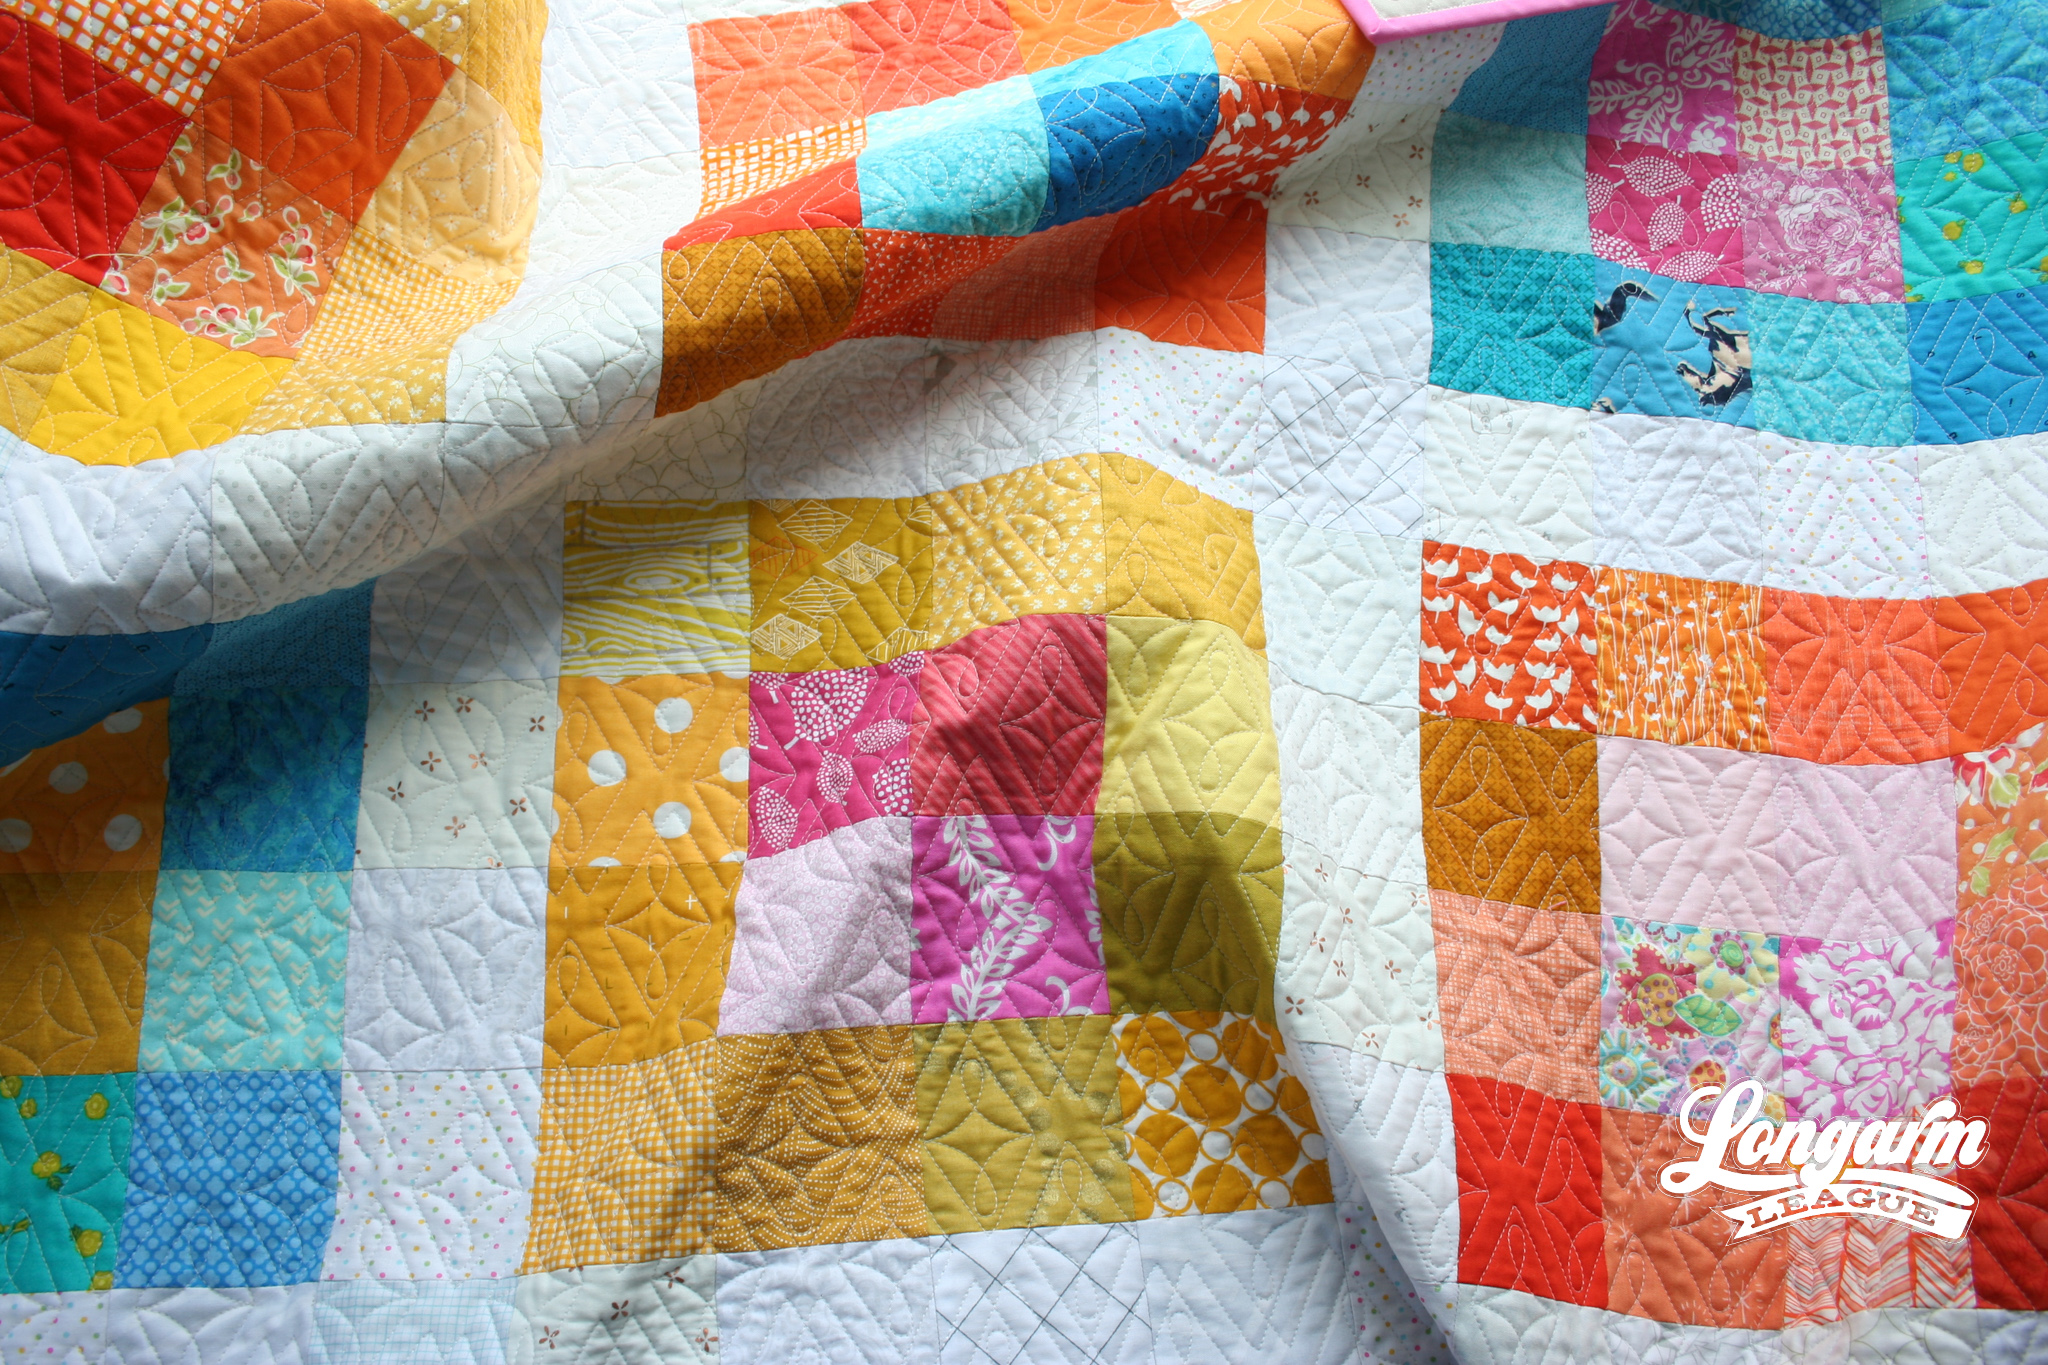
Here's the sizing I used for the digital pantograph (quilt size 78" x 96"):
Row Height: 3.75"
Pattern Height: 5.14" (total top-to-bottom height of the pattern in Intelliquilter - this might go by a different term with other computerized systems)
Gap: -1.387"
Offset: none
Backtracking: none
I've been slowly updating some of my early digital designs like this one to include new PDFs. If you already have Diamond Loops, you can download the PDF file here. If you'd like to buy Diamond Loops, the PDF is now automatically included as part of the zipped files emailed to you upon purchase.
The Binding
I knew I didn't have enough yardage of any one fabric to make enough binding for this quilt, but I did find a good combo of a pink solid and a multi-colored dot fabric that coordinated. It's just the finishing touch it needed, and probably fitting that it's scrappy like the quilt.
There's one last thing I'd like to mention because it's enhanced my sewing experience in more ways than one. A few months ago, I invested in an adjustable height desk from Uplift. The desks come with many different customizable options. I got the 72" width so that I could use my laptop at one end of the desk and have my sewing machine set up at the other end at all times. This has been a huge contributing factor to my increase in sewing! It's so easy when I have my machine out and ready to go. I also opted for outlets in the desktop itself. I have a total of 4 plugs—two on each end—and use them constantly.
At first, I didn't know how much I'd actually adjust the desk height and if it'd be worth it to get this kind of desk, but now I can answer that I adjust it EVERY DAY I'm in my sewing room. It feels good to change my body position whether I'm working at the computer or sewing.
Back to binding—when I finish quilts, attach binding to the quilt on my domestic machine and also stitch it down on my domestic machine. I just wanted to add that I particularly enjoy sewing the binding while standing up! It's so nice to have the big workspace to support the weight of bigger quilts during this step and I feel like I can manage the bulk more easily while I'm on my feet.
If you are a longarm quilter, how are you carving out time for your own creativity? Or are you? Do you feel guilty working on your own projects when you have other quilts for your clients that you could be working on? I'm not here to judge—that was me, too. But, I hope you can change that by blocking off time in your calendar for a weekend or another good chunk of time. Or sign up for a retreat and get outta Dodge, if that's what it takes. Your creative self is worth fighting for!

Jess Zeigler
Longarm League Commish & Owner of Threaded Quilting Studio, LLC.


