
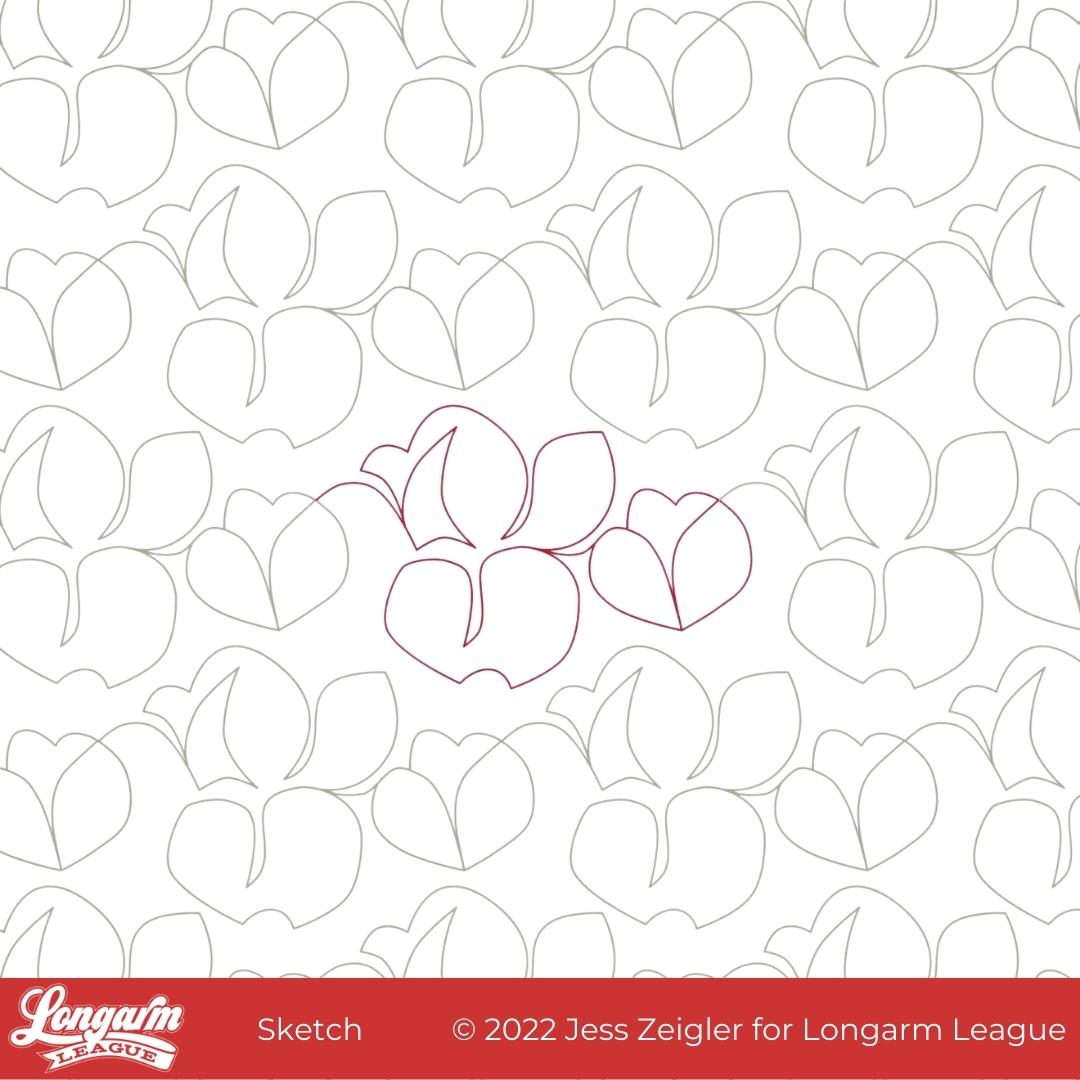
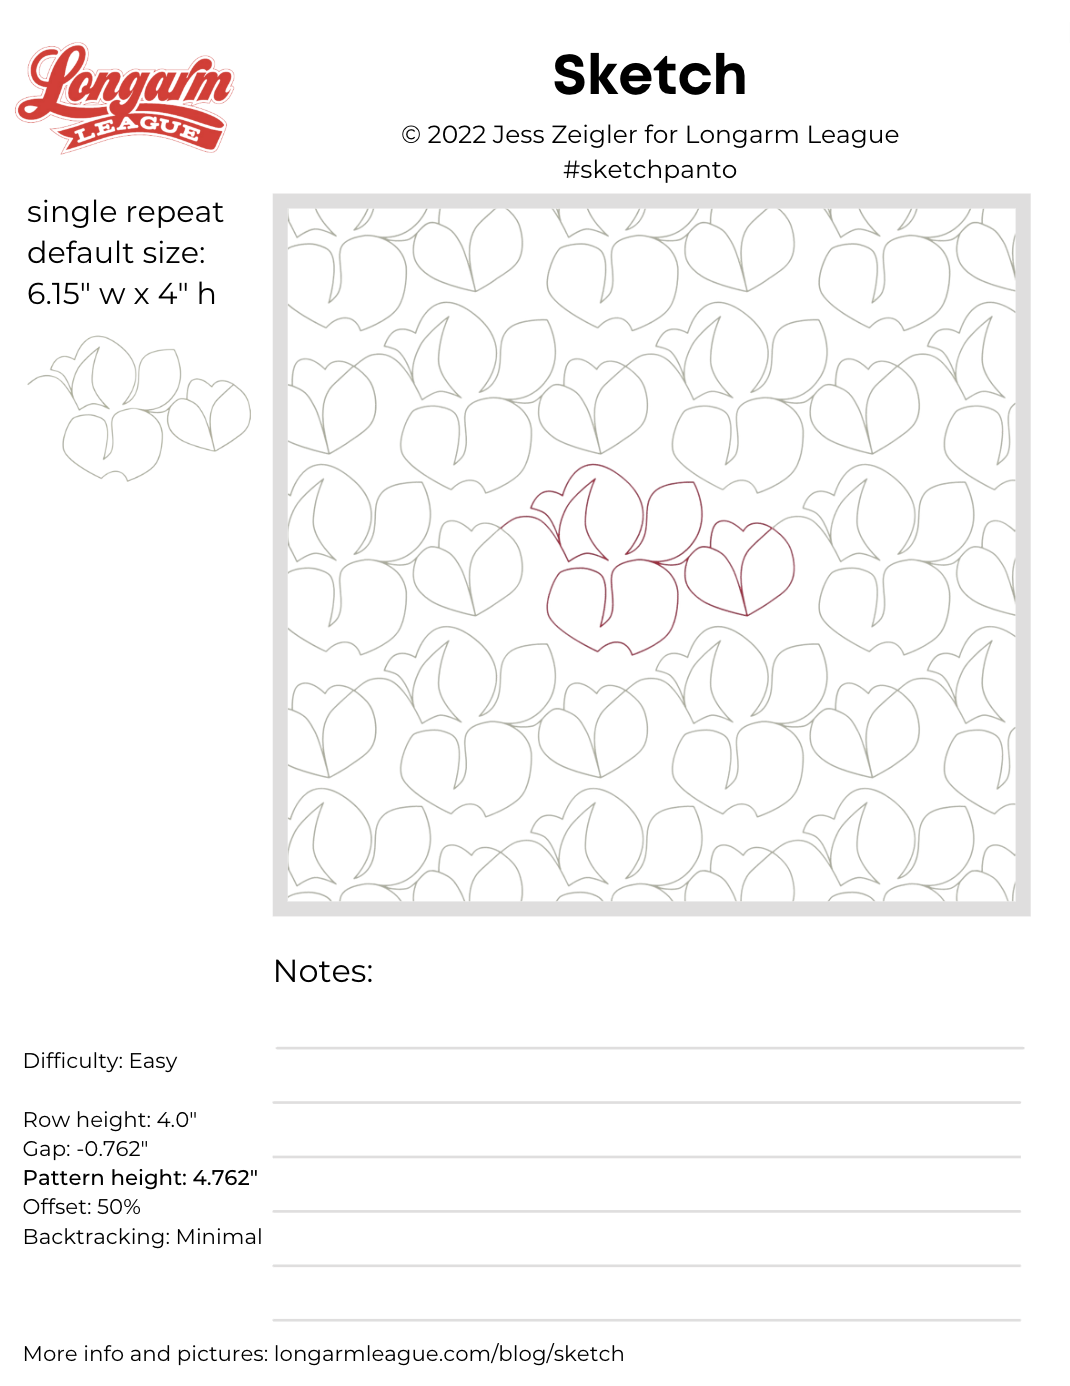
Sketch Digital Pantograph Quilting Design
This is Sketch! Up until very recently, I'd planned to name it Cottonwood but when I discovered that's already another designer's pantograph name (with a related hashtag). I decided to go off-script and name it something unique.
The only trouble with having a really abstract design that could look like one hundred things and also nothing? Naming was hard. Why does it seem that I either have great name right away or I'm stress-listing stream of consciousness options and calling on friends and family for help? There's no in-between!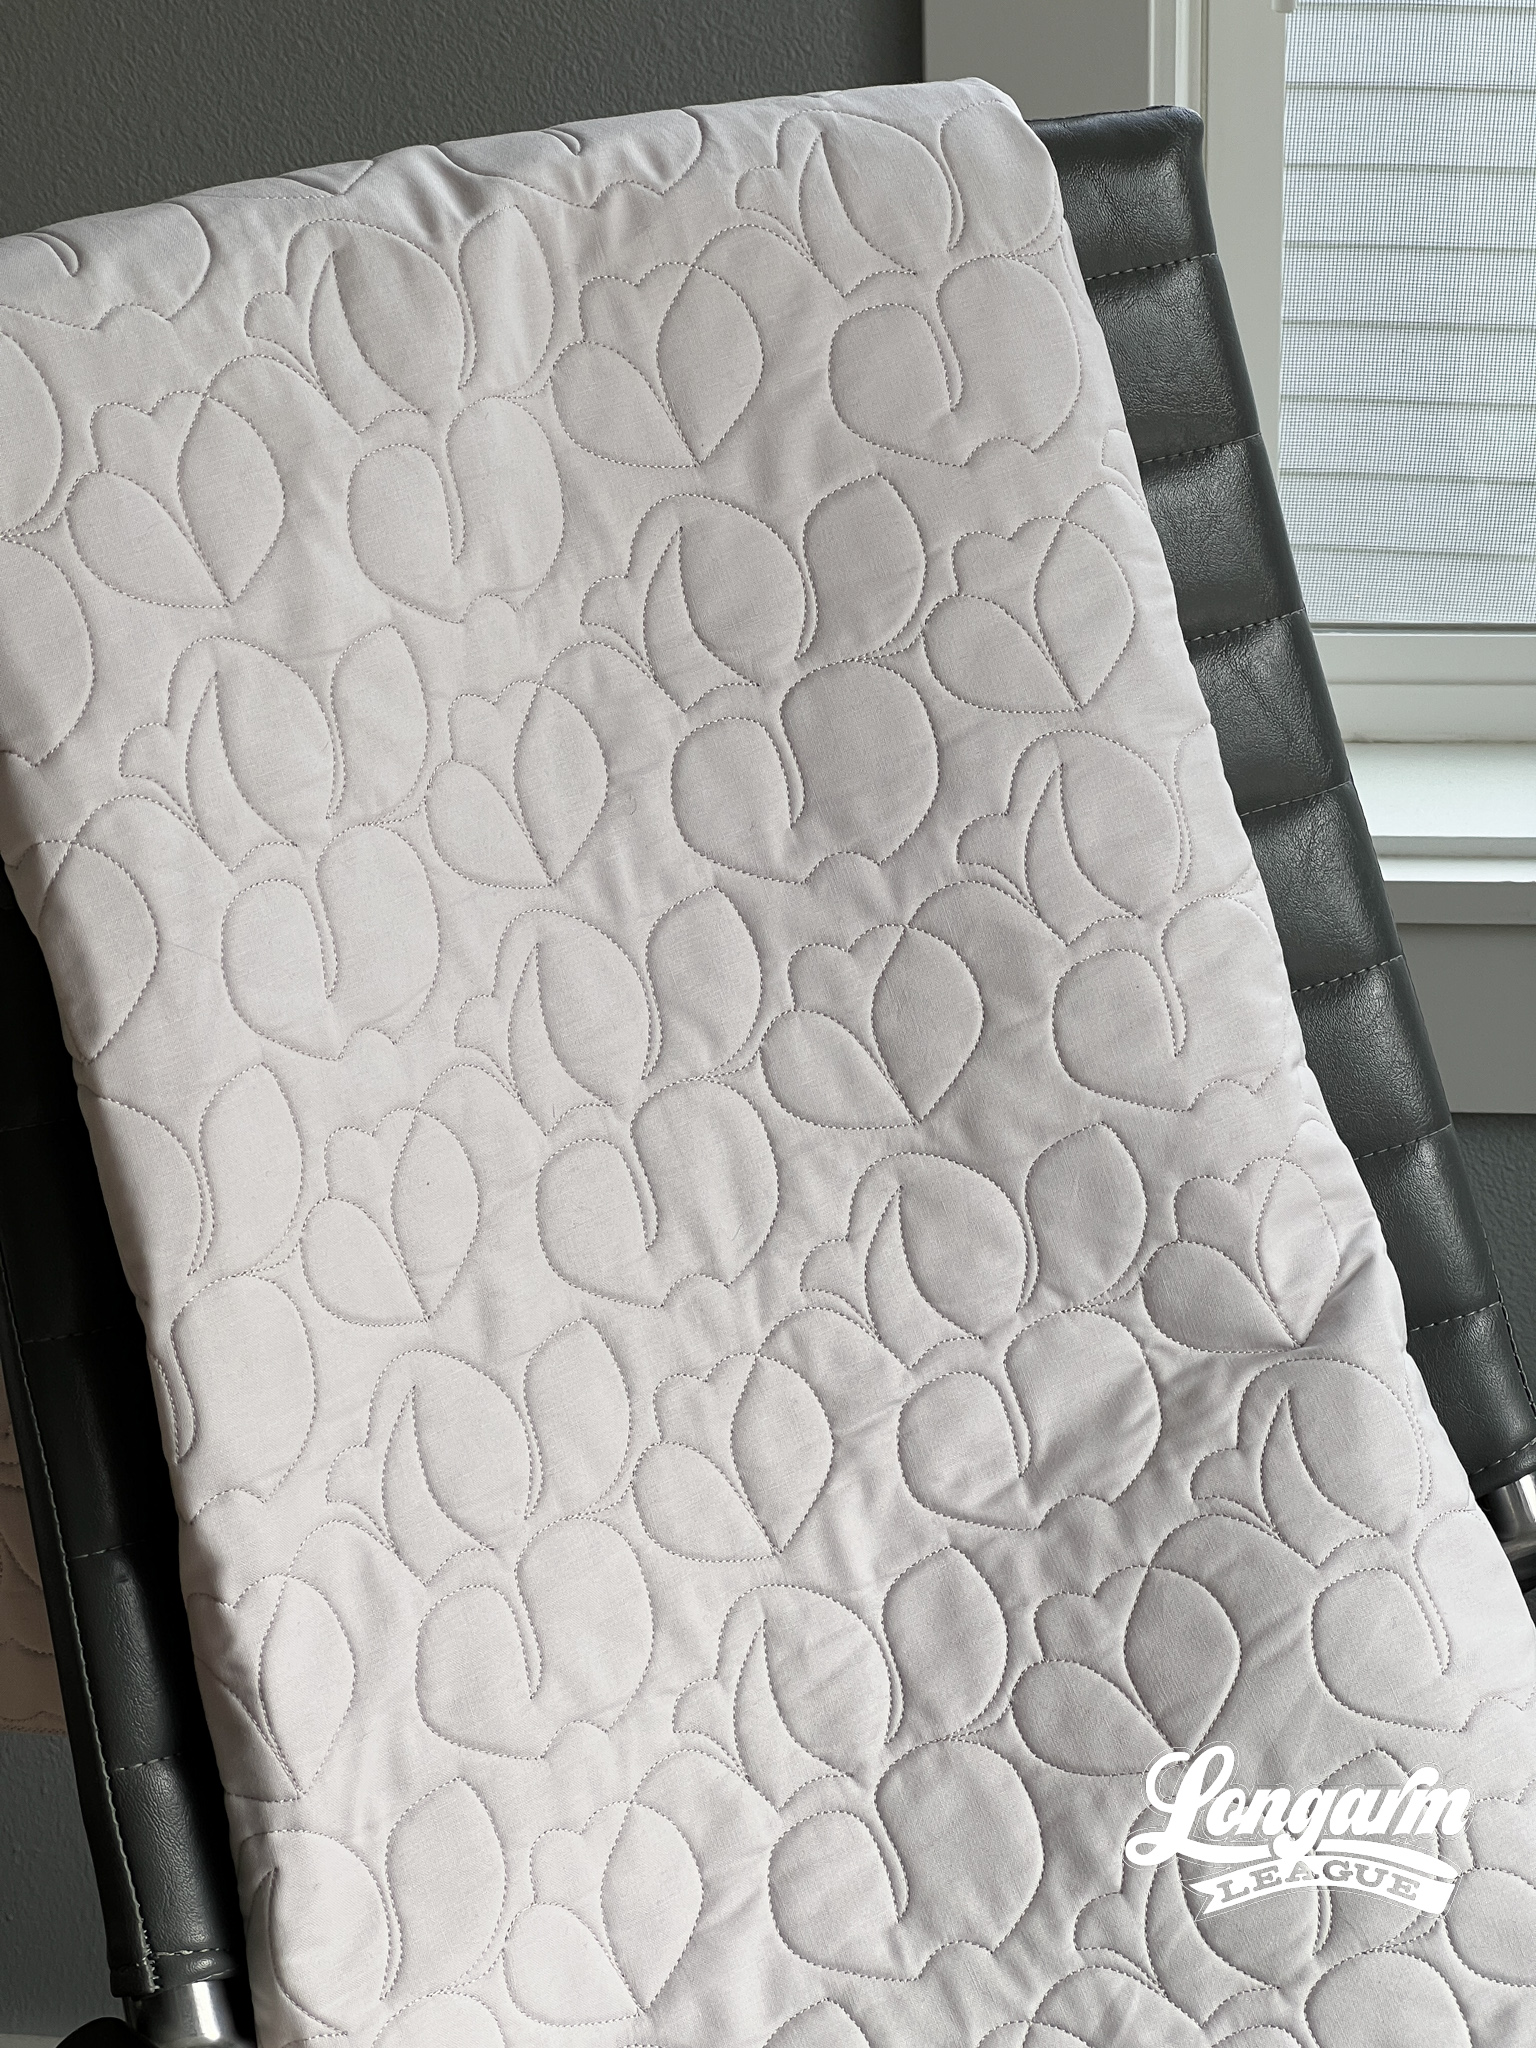
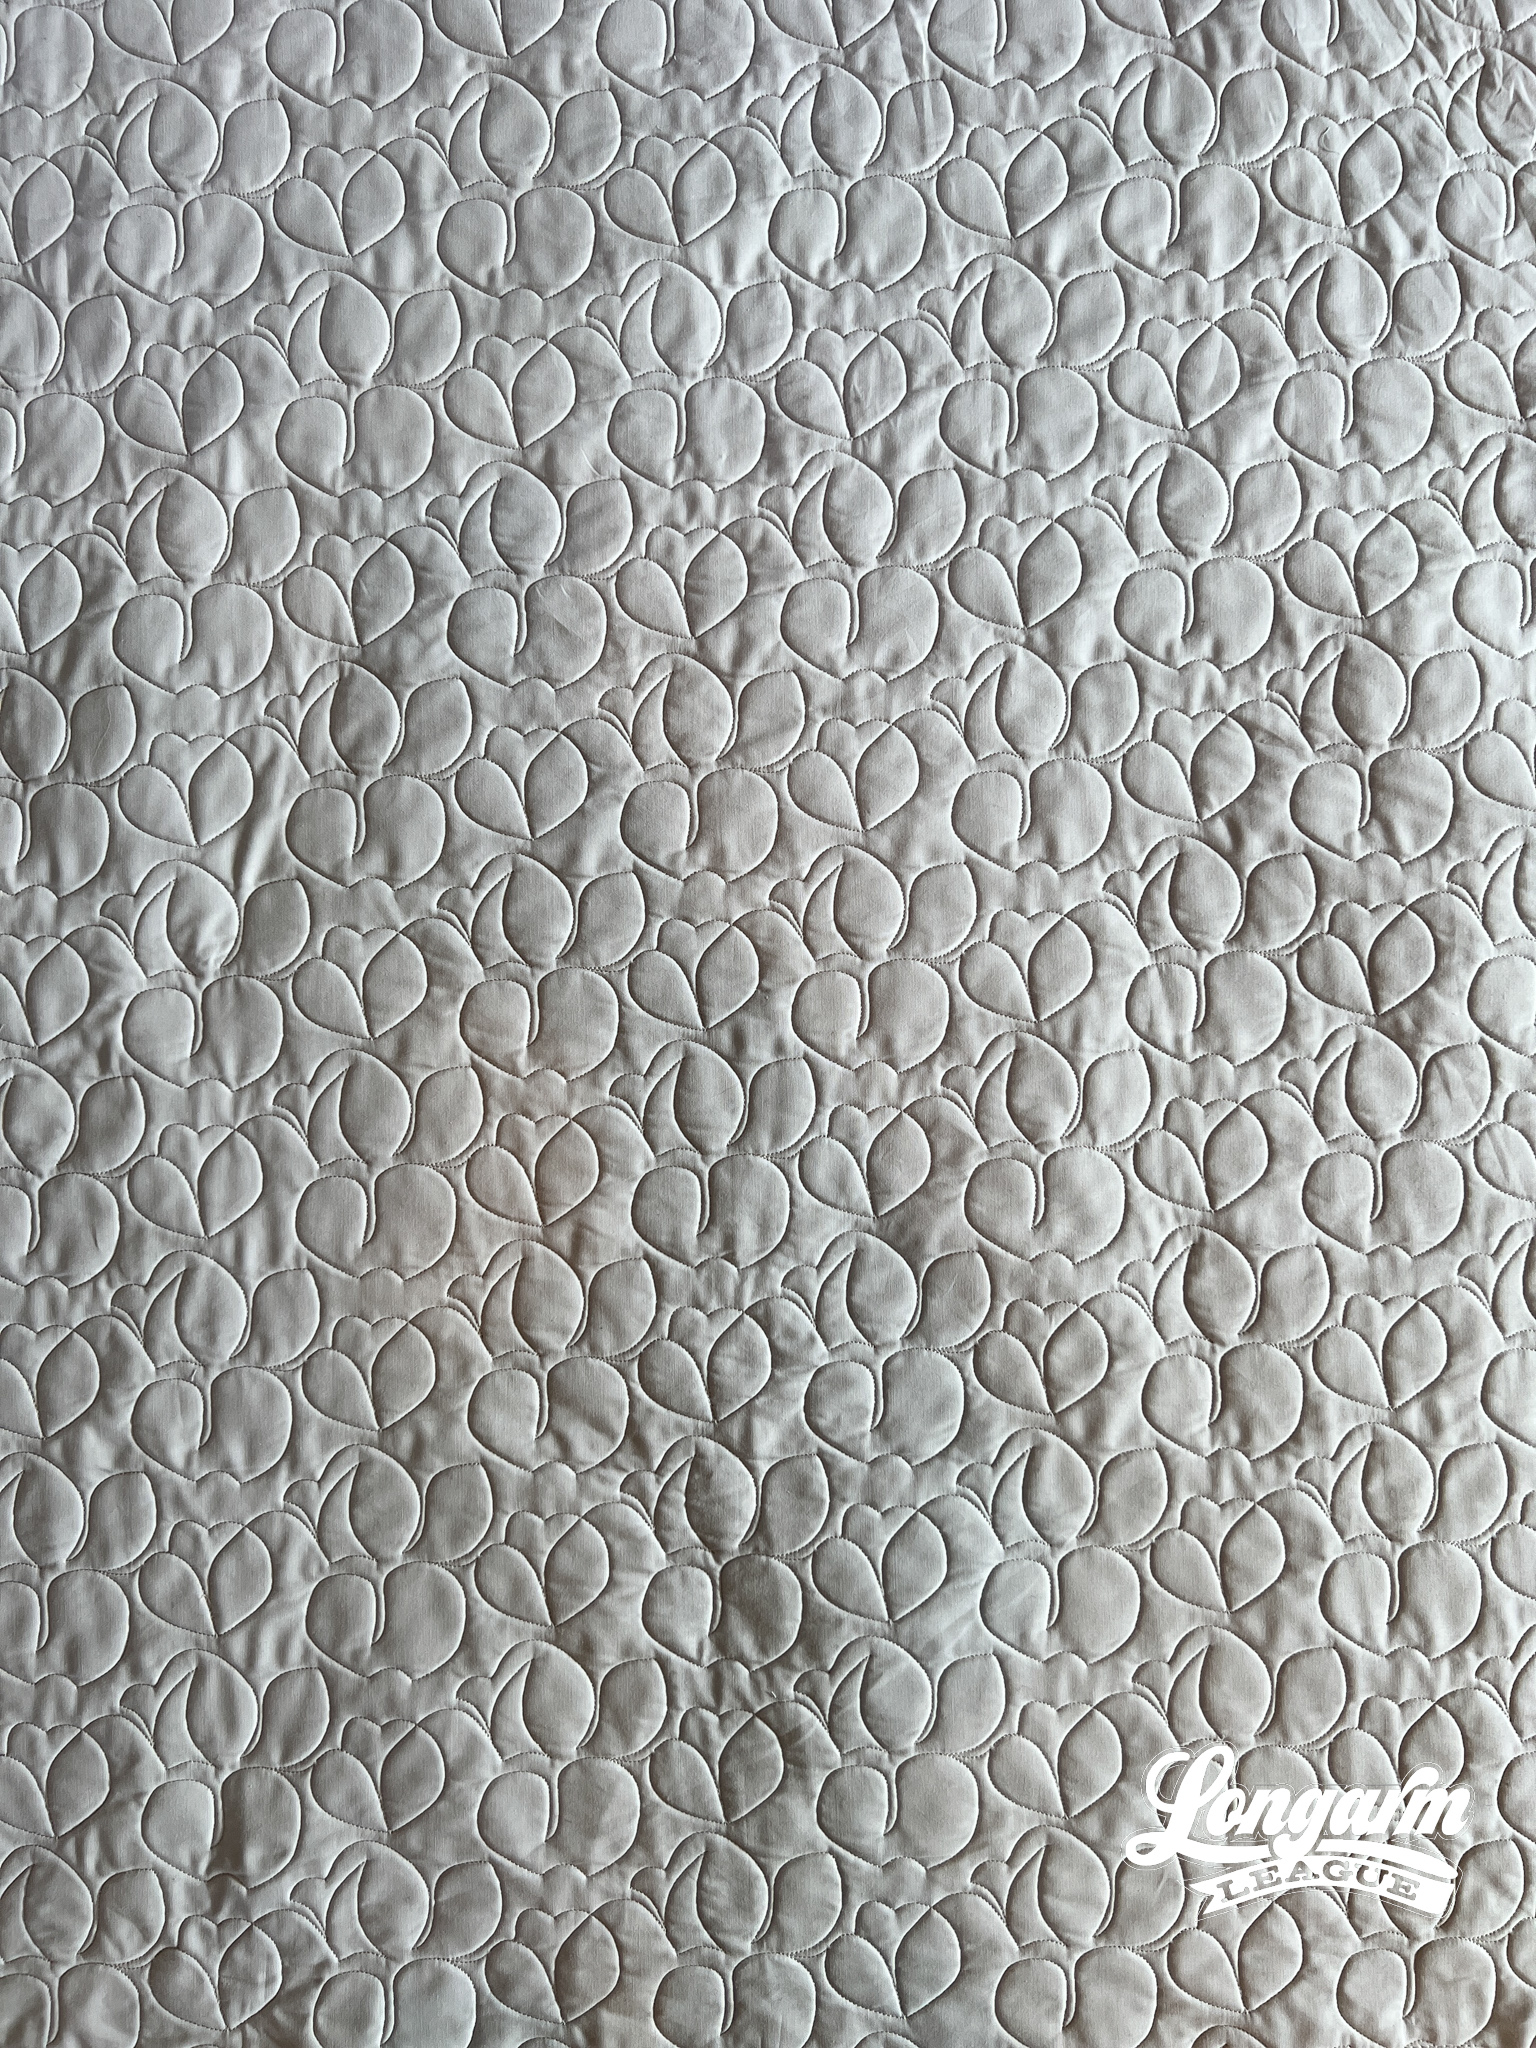
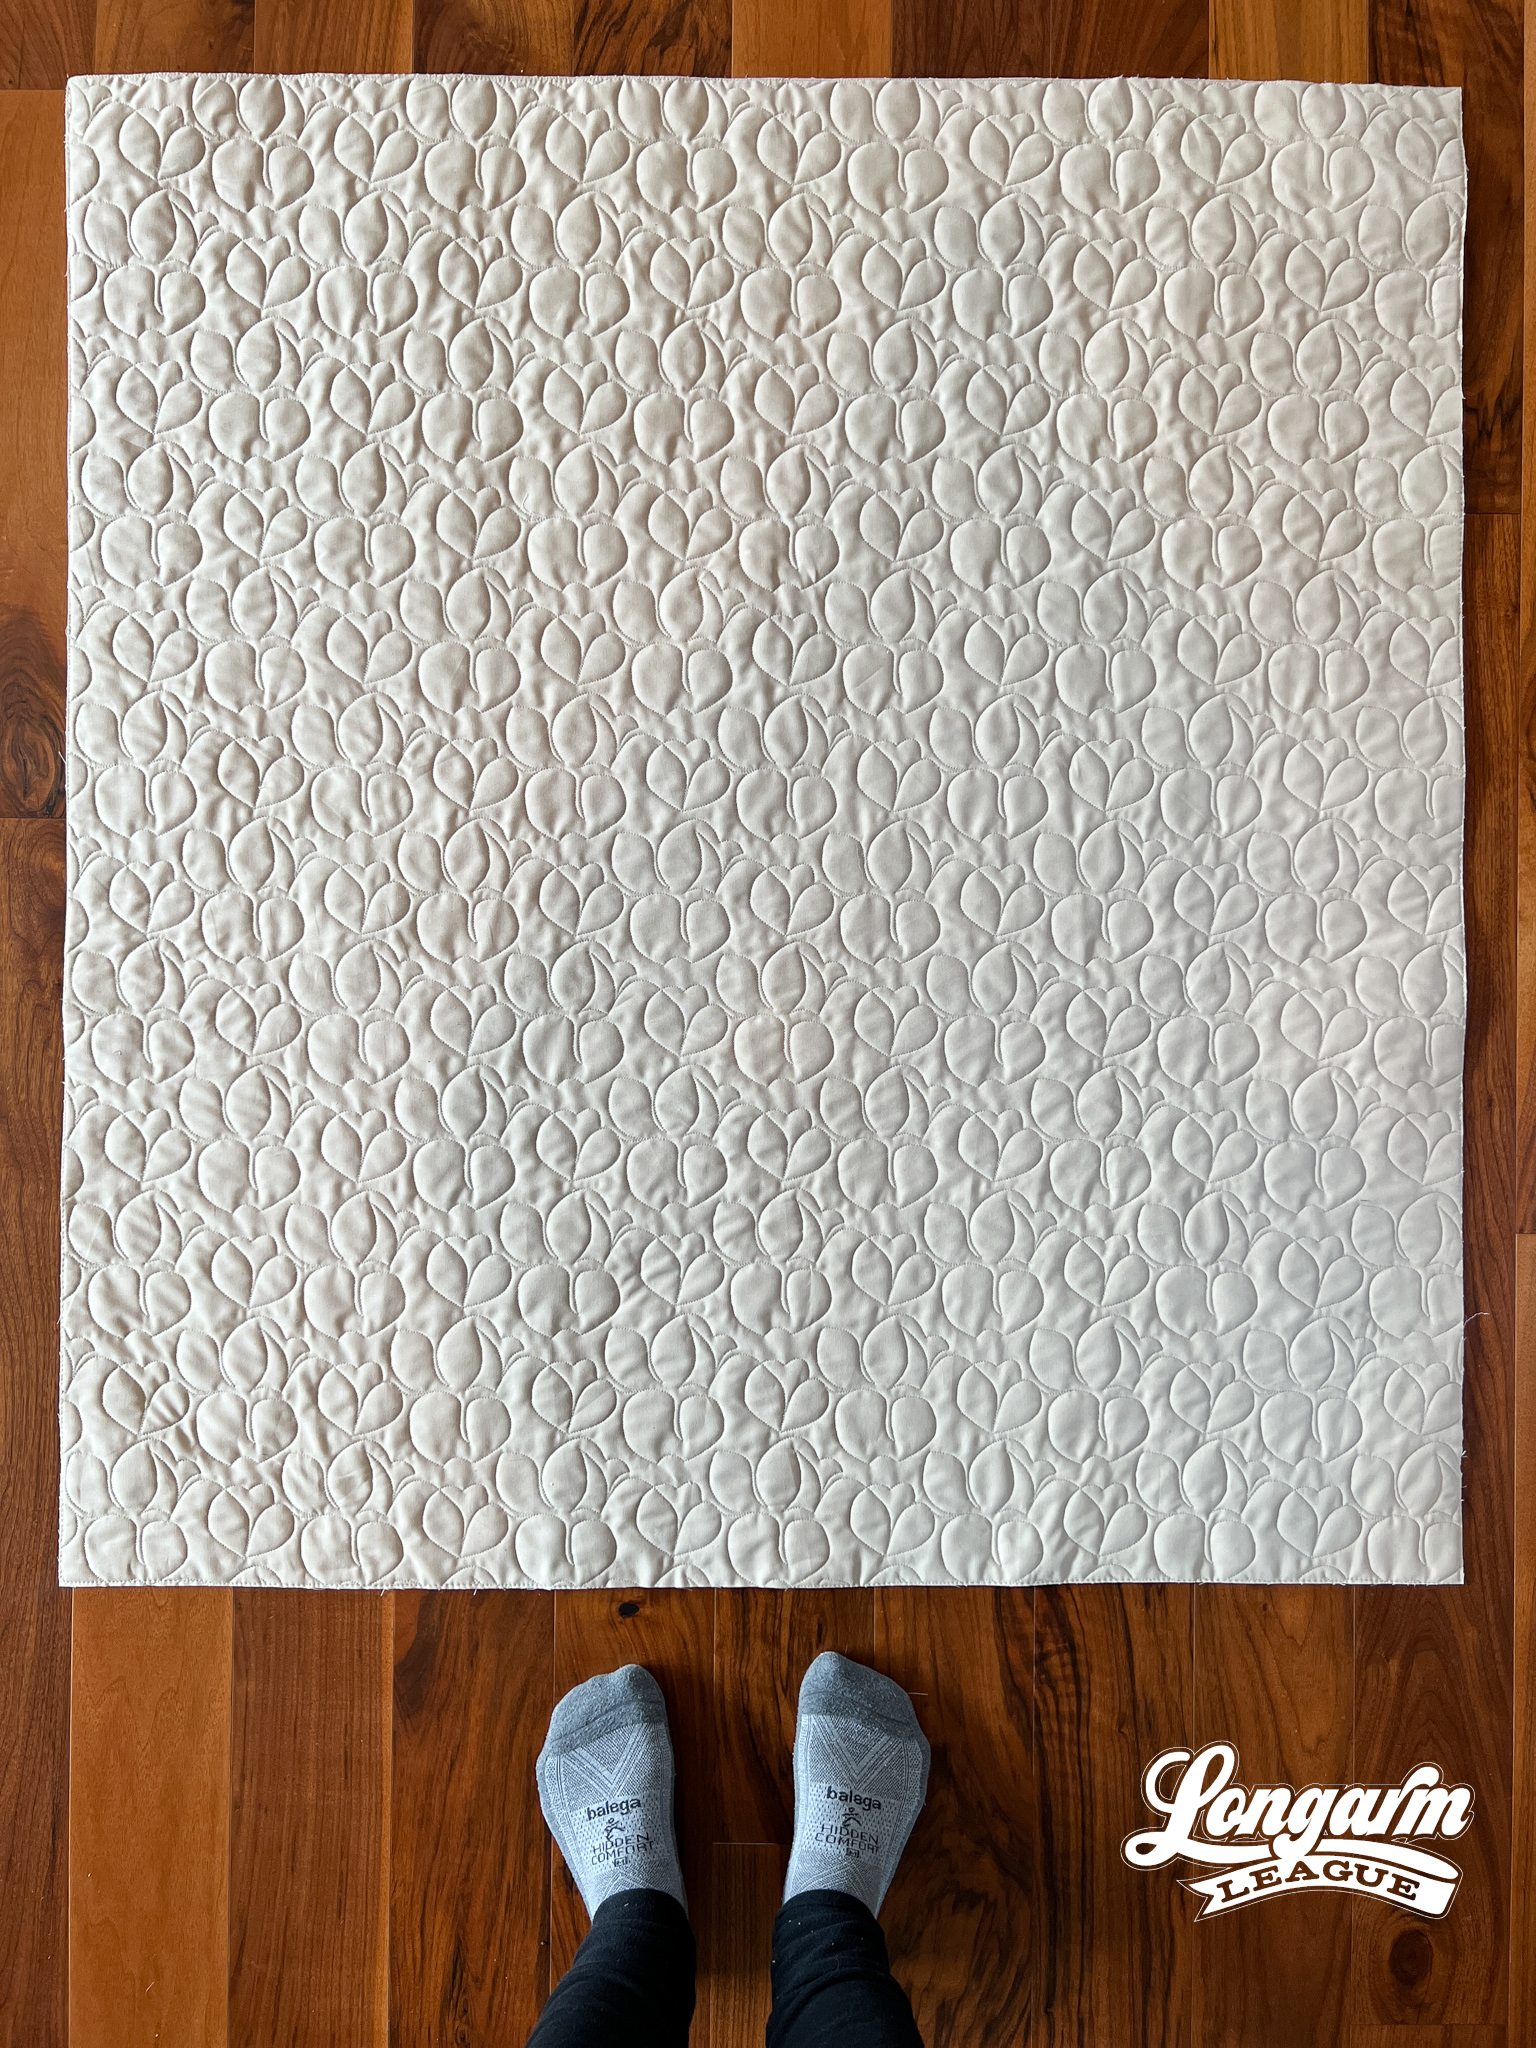
What I like about this design is that it's much more abstract and off-kilter than designs I normally create. There's a fun energy to this design—a bit folksy and quirky. I'm ordinarily not one to use negative space when it comes to pantograph designs, but I have to say that I like the organic-looking spacing of the motifs between the rows with this design. It looks more free-flowin', like a sketch!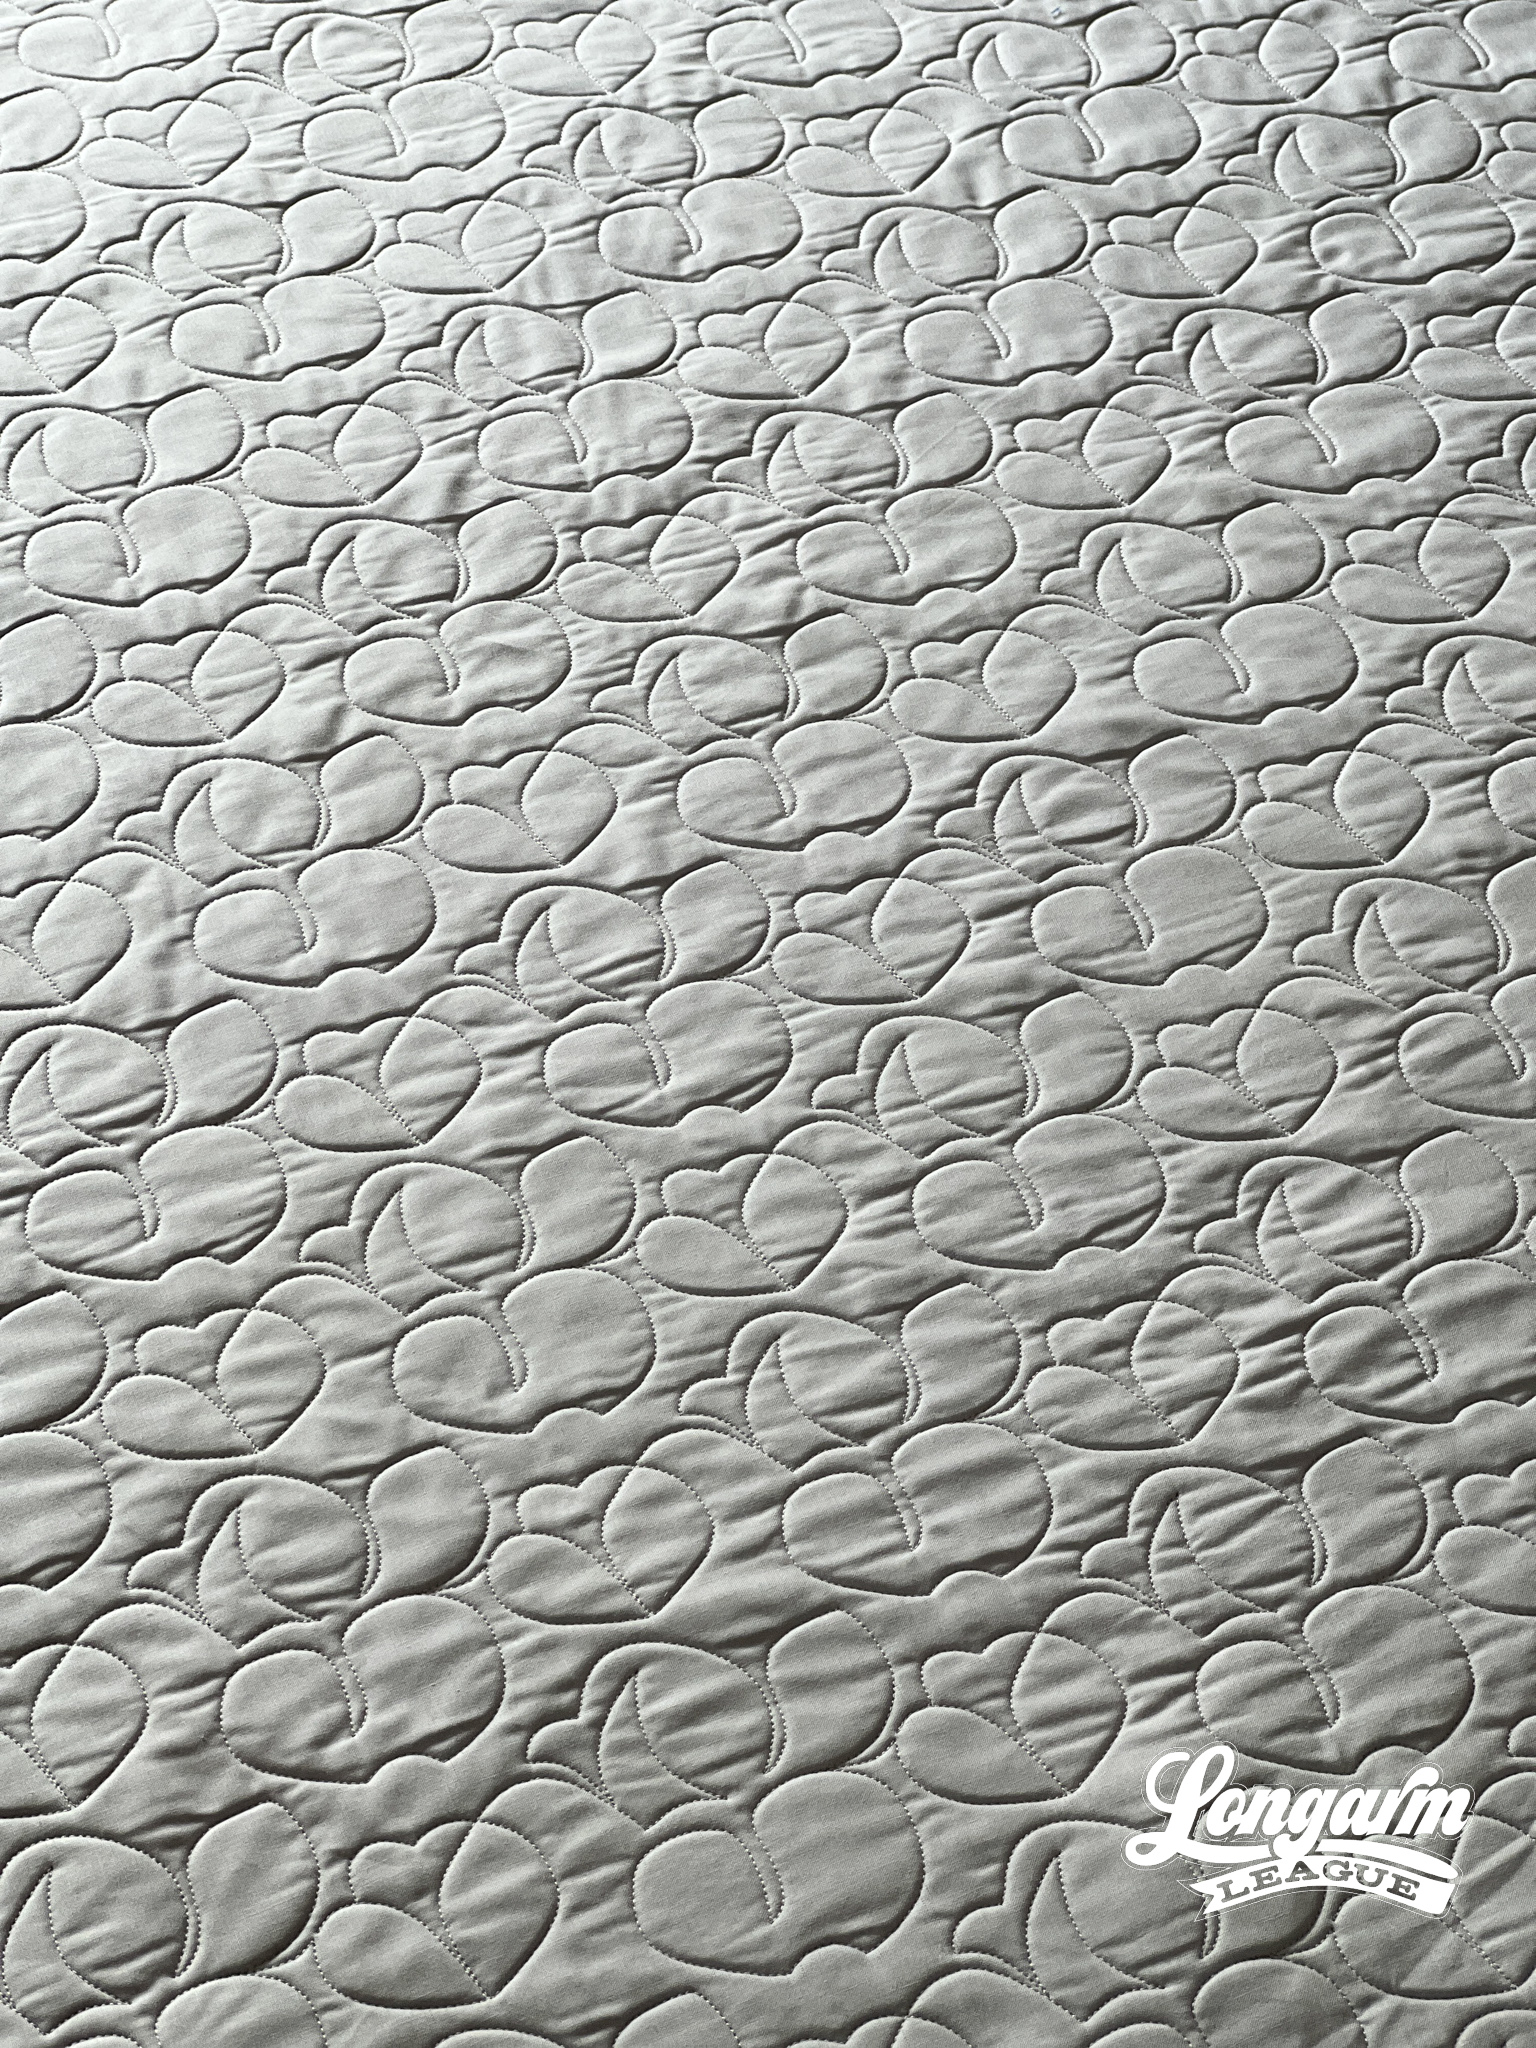
I also like that the overall texture reads as rounded shapes. This design would work well with any quilt in the modern style, including kid quilts. I could see this edge-to-edge design with floral fabric or patterns, tree or fruit themes, drawing.
Why am I picking up notes of adorable Denyse Schmidt small scale fabrics here? Imagine me sniffing this sample like a glass of wine. 🍷
Fusing batting scraps, a detour
It's been a few years now since I've quilted for my own clients, so I haven't ordered batting rolls in a while. I've had various individual batts along with scraps from other projects that I'm trying to use up. Let me tell you, I am getting down to the dregs and will have to place a new order soon. But not quite yet. :)
To complicate matters, if you saw my IG Reel last week, you'll know that I'm currently without my sewing machine. Oh, the humanity! Normally, I'd use my domestic sewing machine to sew a quick zig-zag stitch piecing scraps of batting together. Since that wasn't an option this time (I'm close to buying a backup sewing machine but haven't yet), I was really glad that my past self bought some of this (Amazon affiliate link) Heat Press Batting Together fusible tape.

I was just a teensy bit worried to fuse my batting together because both remnants were Quilters Dream poly and I didn't want it to melt.
I cut off a few smaller tape pieces and tested a small portion first using a lower iron setting. Everything went well, so I cut more fusible tape pieces and fused the whole width. In the past, when I was confident that I wouldn't melt cotton batting, I cut one continuous length of tape and slapped the whole thing on at once. That works, too. Since this was a sample, I experimented with leaving small gaps between the tape pieces so that I could extend the use of the tape. On a client quilt, I wouldn't try to cut corners.

If you don't have fusible tape like this handy, do yourself a favor and (Amazon affiliate link) buy a roll or two of this to have on hand. This tape saved my bacon before when I realized (too late) that a client had not provided enough batting and I had to fuse more batting while the quilt was on the frame and I was nearly done quilting.
I've also seen it suggested to overlay one edge of batting with the other and make a shallow meandering cut between both layers to avoid a distinct straight line cut, but I didn't bother doing that this time, knowing it was for a sample. Here's a quick video demonstrating the curvy-cut technique.

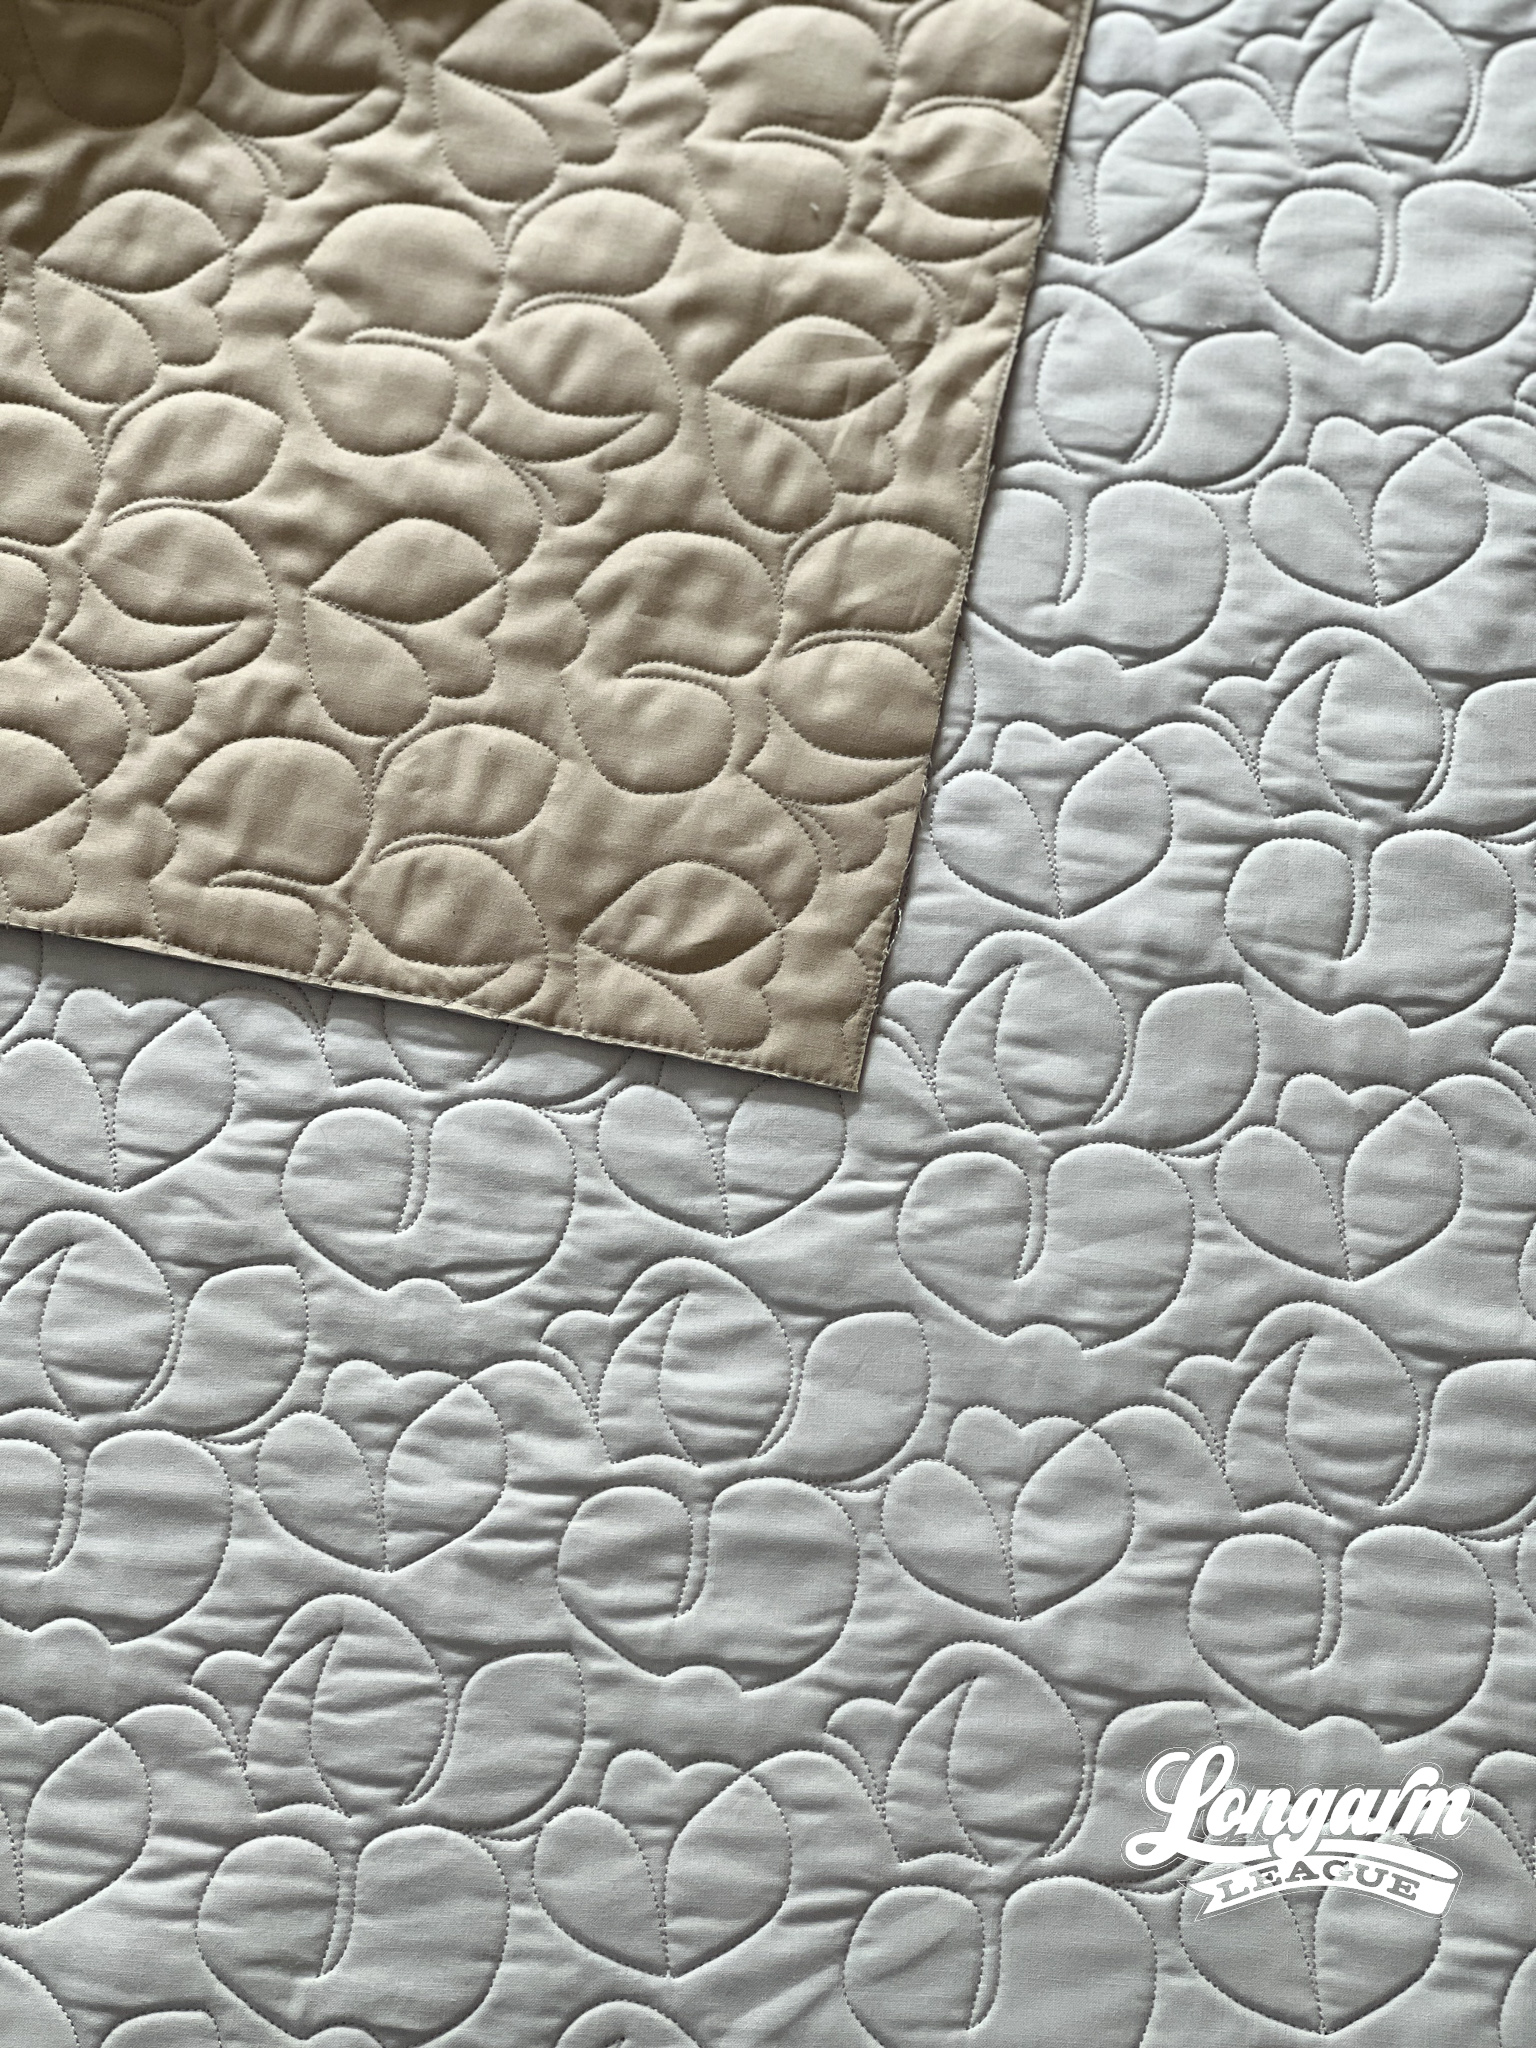
The seam was undetectable after I quilted and trimmed the extra batting and backing away. Hooray!
Back to the Sketch pantograph: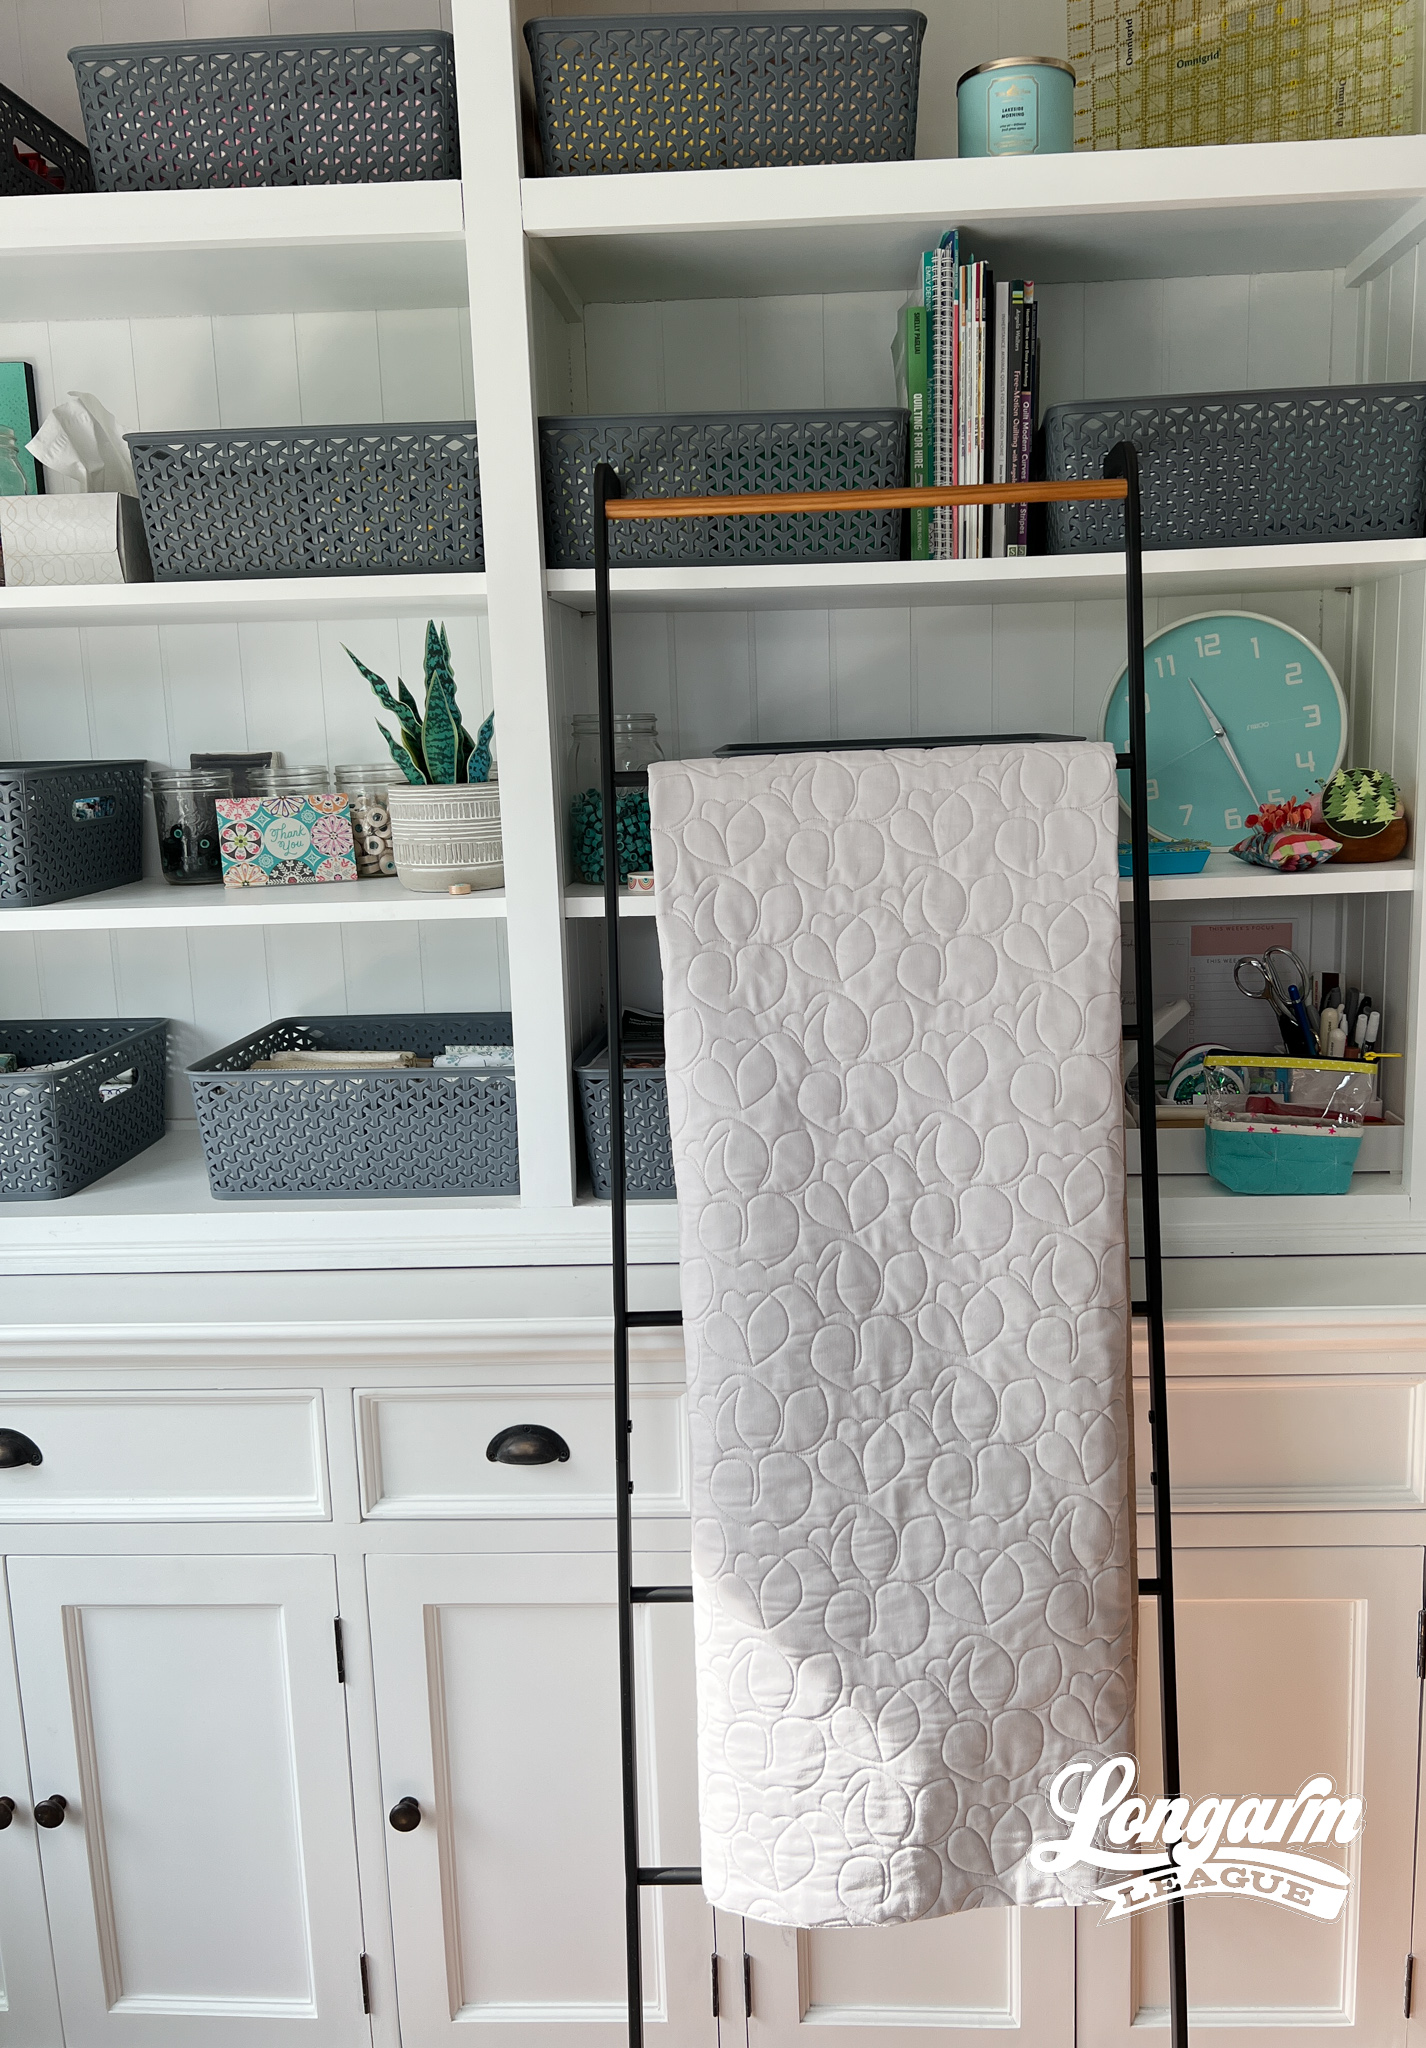
In order to set up the pantograph as designed, you'll want to use a 50% offset. This just means that every other row gets staggered. Then close the gap in between rows to your liking, and you're all set!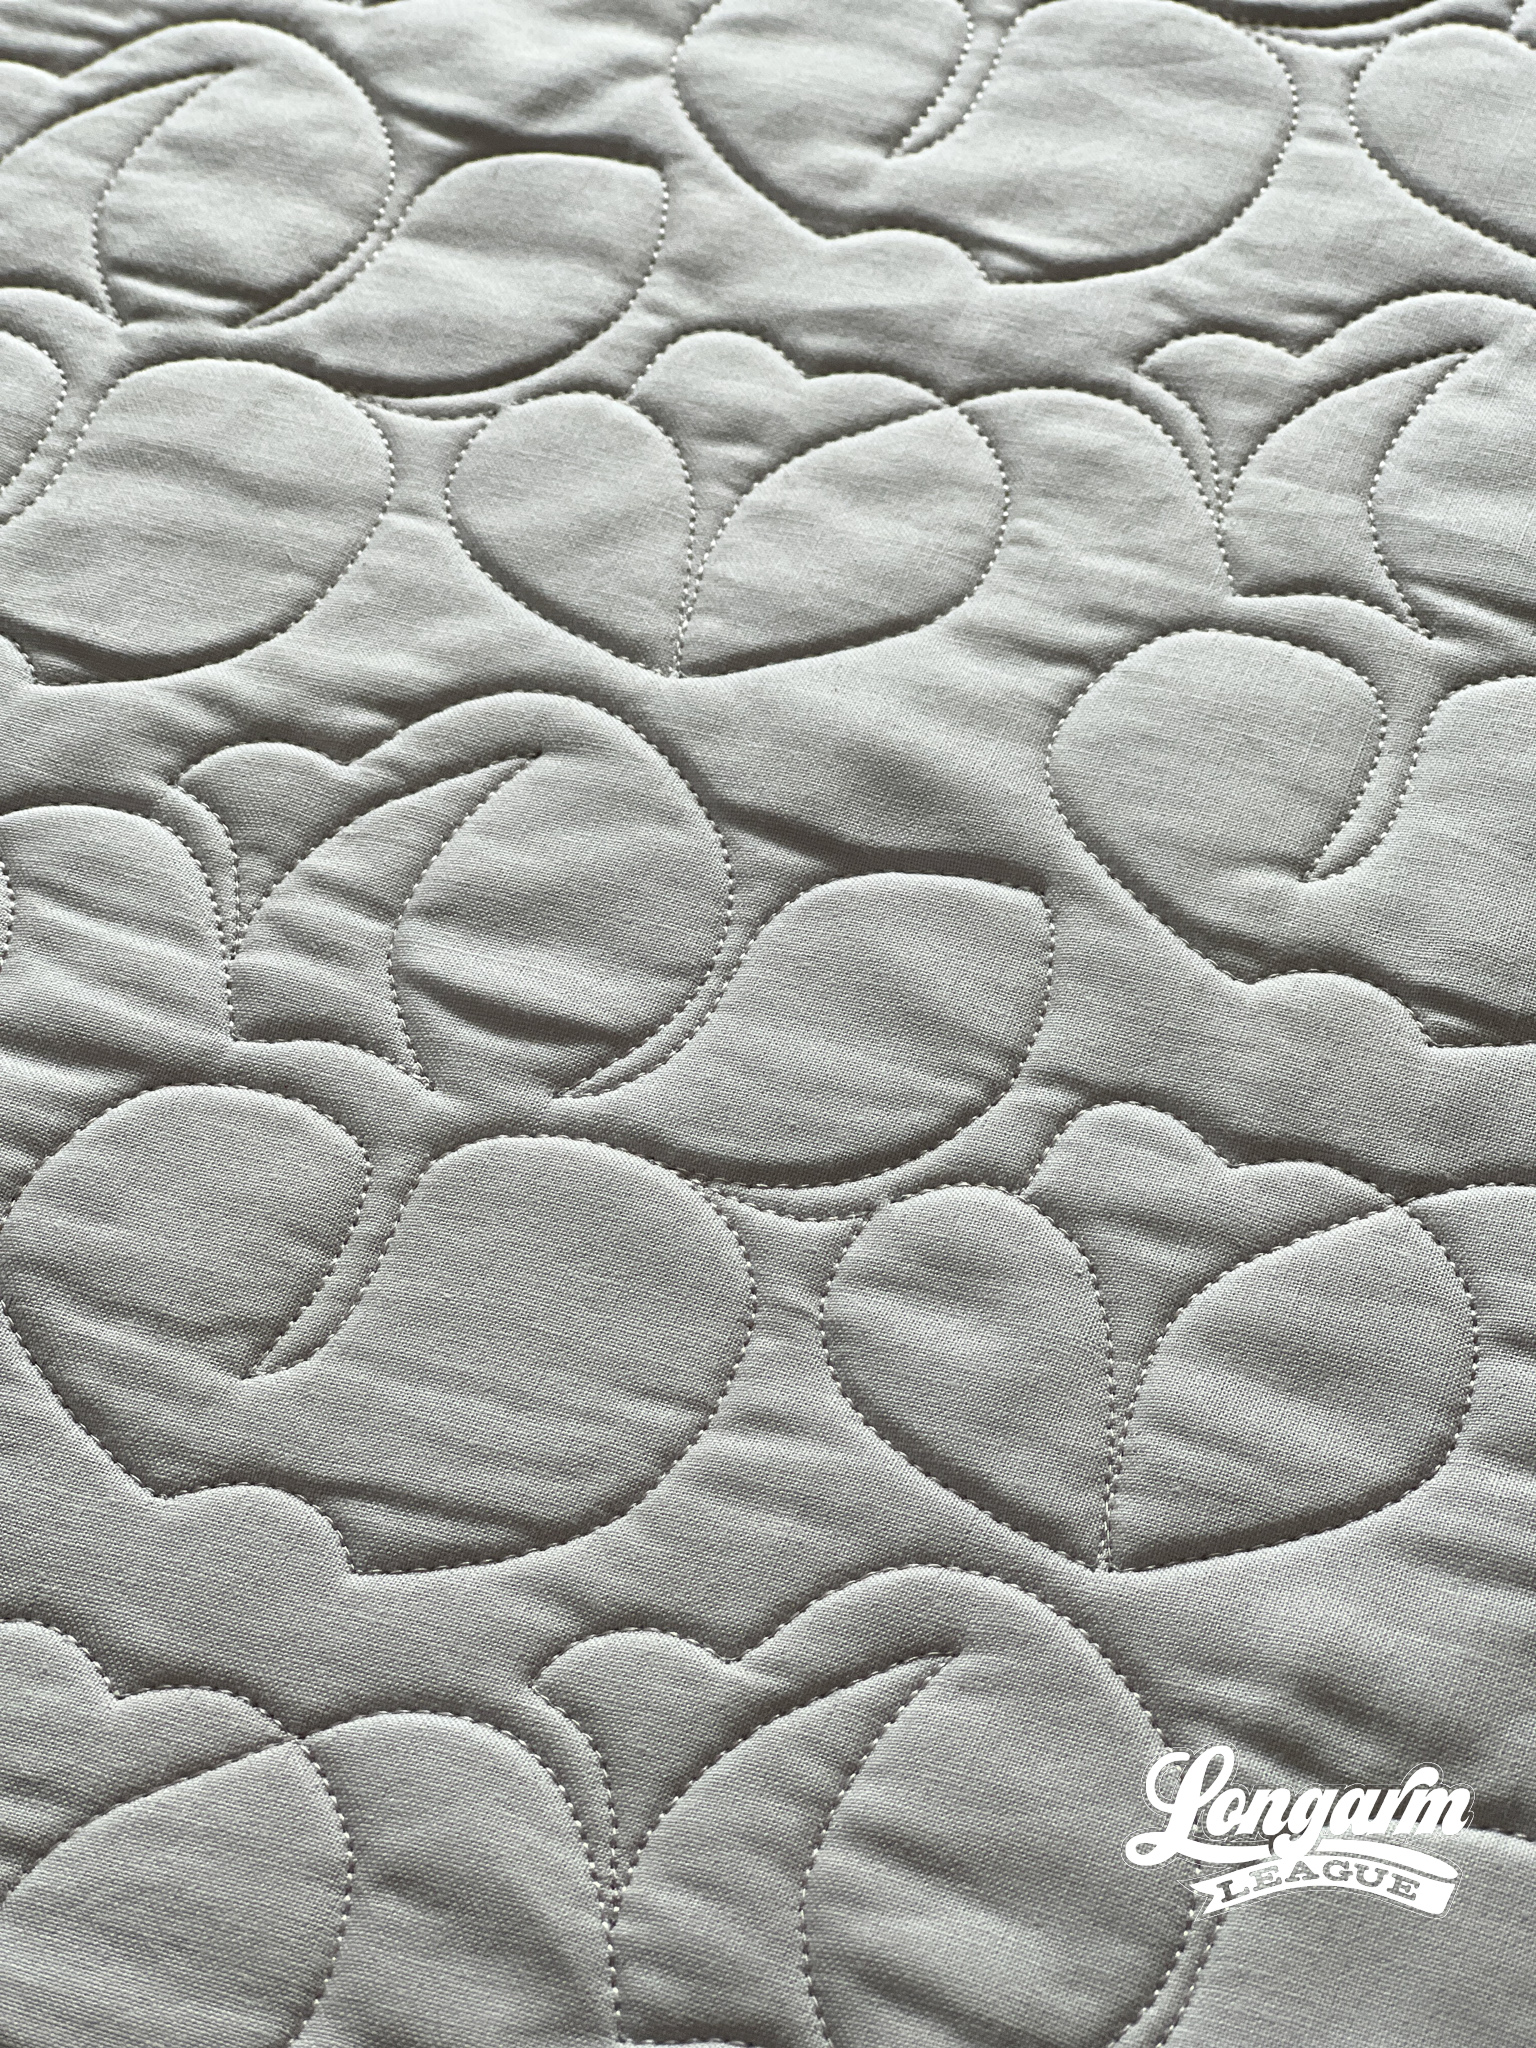
Here are the specifications for how I set up this design using my Intelliquilter on a baby-sized quilt sample (40" x 50" quilt size):
Row height: 4"
Gap: -0.762"
Pattern height: 4.762" (measurement from top to bottom of the repeat)
Offset: 50%
Backtracking: minimal
Here's a look at the included PDF:
Take a look at the video at the top of the blog post to watch the stitch path. There's a tiny amount of backtracking in one little spot. The good news is that there is ample wiggle room between rows which makes realignment very easy, and the stitch-out is fast.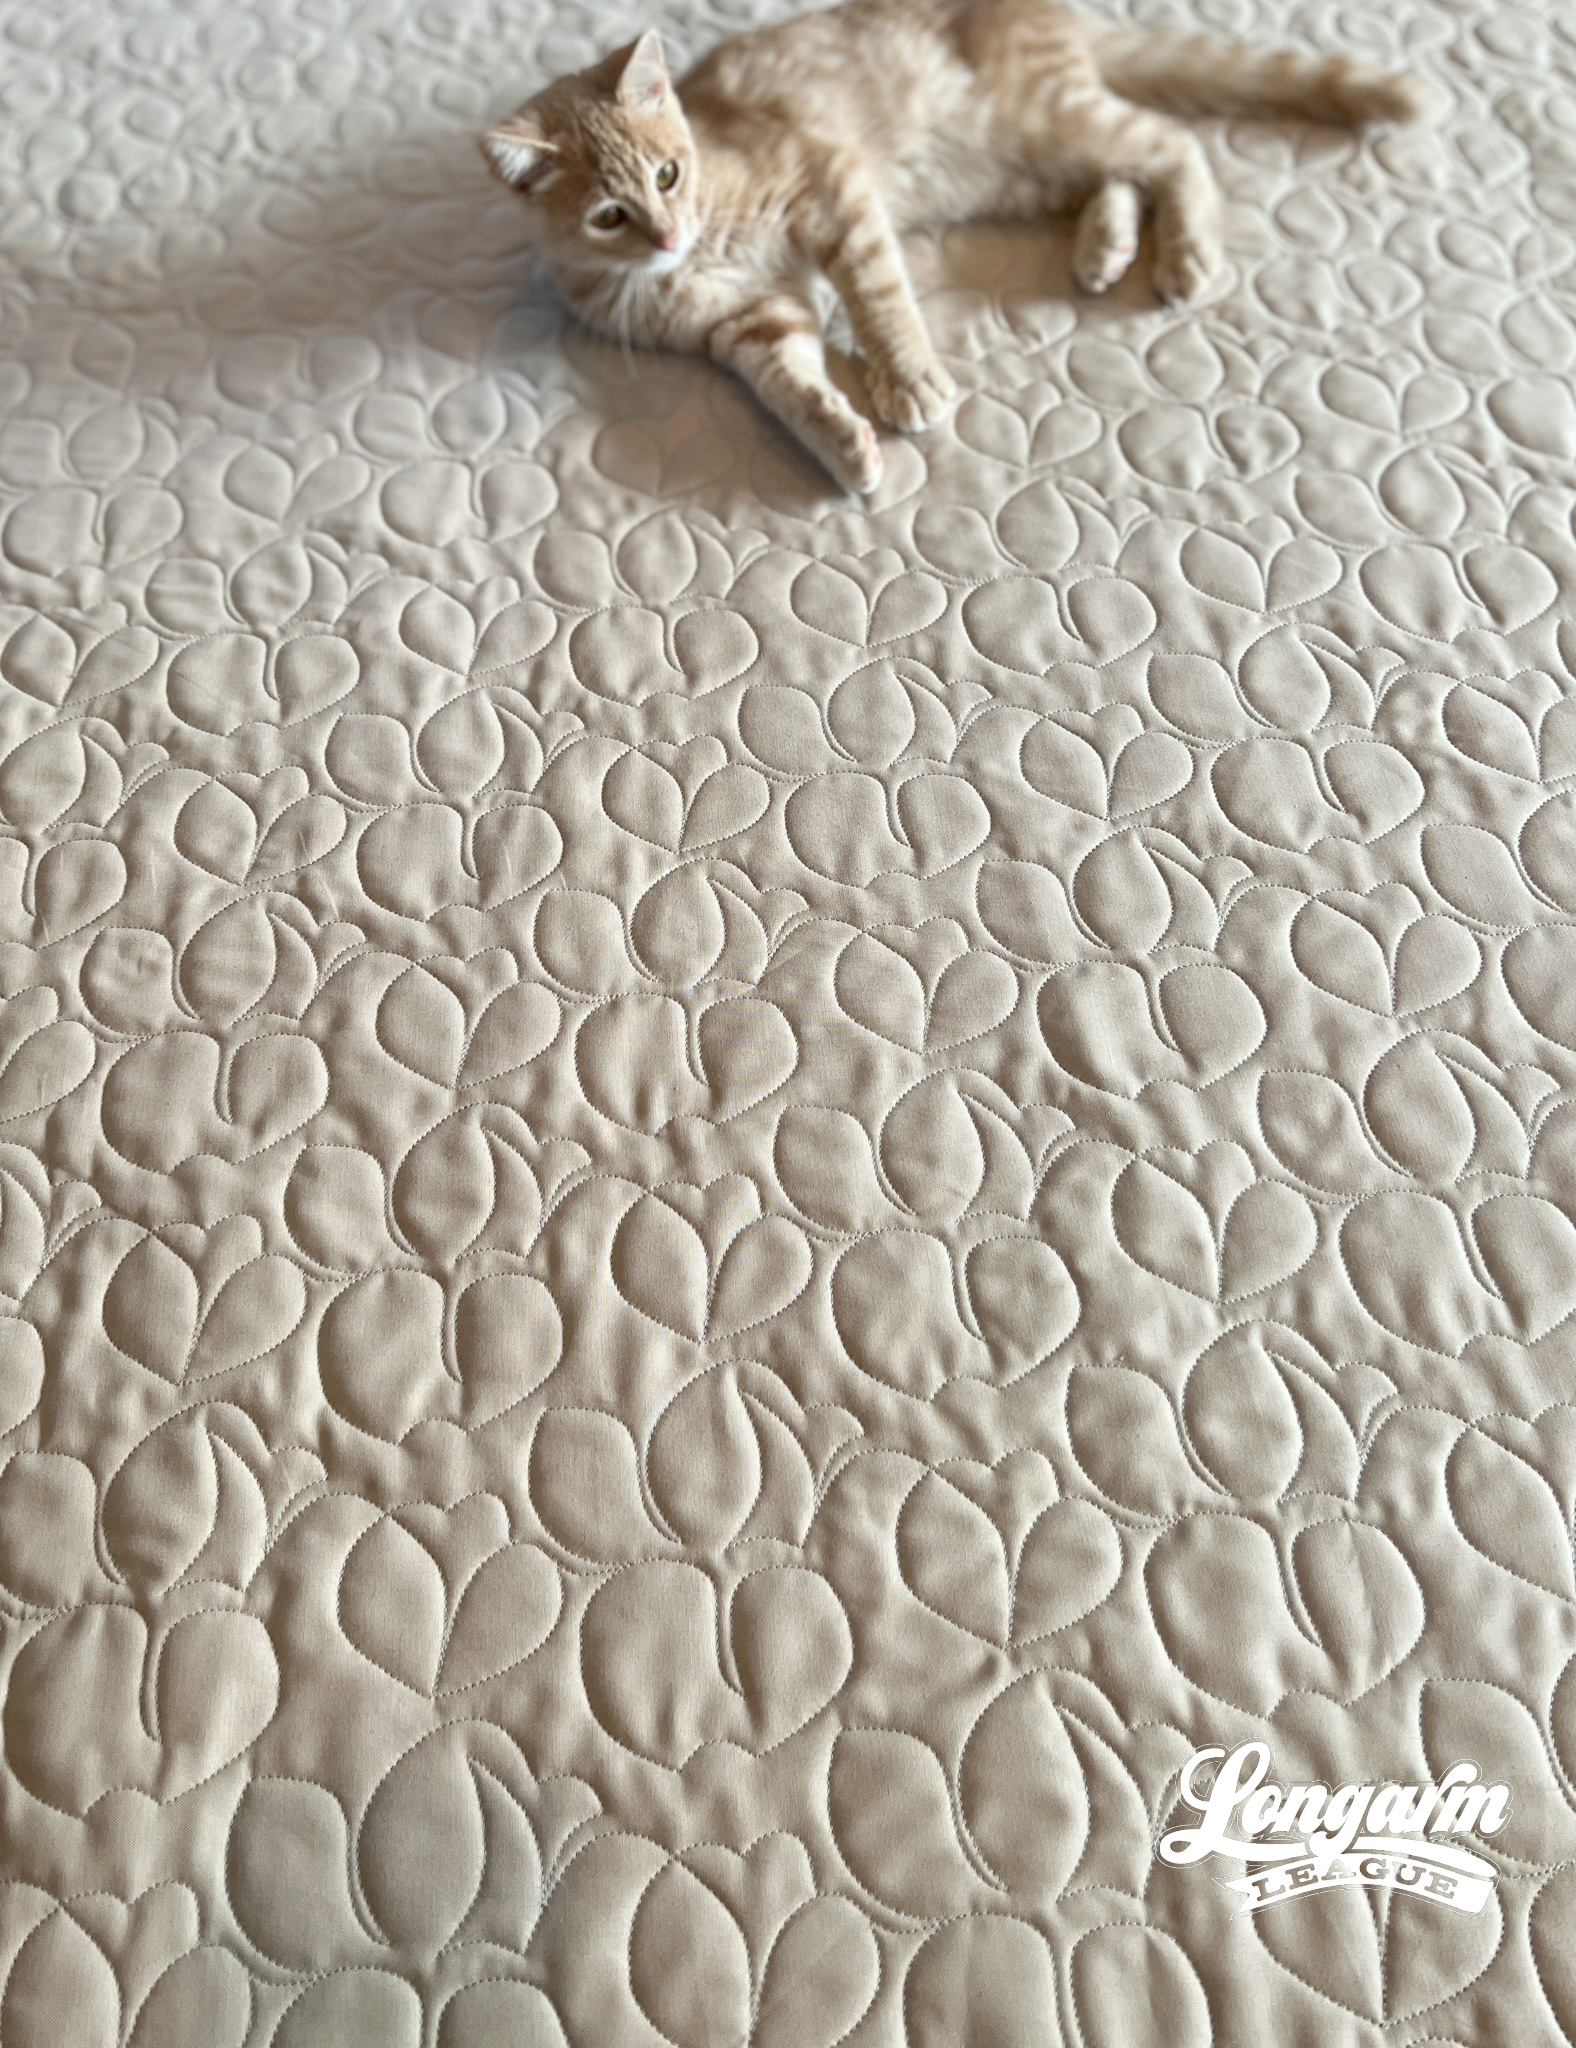
Our newest little buddy Milo joined me ever so briefly in this photo shoot, which works because he matches the Kona parchment color shown here on the back of the quilt. This short video shows how Milo came into our lives a few weeks ago.
If you use Sketch on a quilt, we'd love for you to use the hashtag #sketchpanto and tag @longarmleague on Instagram so we can see how you use it! You can also visit our full digital design shop to take a look at all our previous designs.
Interested in getting new digital pantograph releases the day they come out? Sign up for our Digital Panto Club and get them delivered straight to your inbox on the first Wednesday of each new month.
Affiliate link note: I could be compensated if you buy from my Amazon link. It doesn't cost extra to you, I'm simply required to disclose it.

Jess Zeigler
Longarm League Commish & Owner of Threaded Quilting Studio, LLC.


